The integration with the Printer can be implemented via:
SmartPOS SDK: which involves using pre-built libraries and tools, streamlining the development process. The Printer SDK allow apps to directly print receipts through the SDK that communicates directly with the HAL.
HAL: which consists of a lower-level approach, involving a greater complexity, interacting directly with the hardware components.
SIBS strongly recommends the integration with the SmartPOS printer via SDK.
SDK
The integration with via SmartPOS SDK Printer, consists of the following steps:
Step 1: Requesting a printer sample to SIBS onboarding team
To perform the integration with the printer via SmartPOS SDK Printer, a printer sample must be requested to SIBS’s Onboarding team through Jira. This integration with the printer is compatible with all SmartPOS devices in MULTIBANCO Network, except Nexgo.
Please note that if you pretend to integrate with Nexgo’s printer, it can only be implemented via Nexgo SDK.
Step 2: Initiating the SmartPOS SDK Printer
This step consists of calling the init method to initiate the SmartPOS SDK Printer. For some features of the device itself, the SDK needs to have access to the context of the app. Start method receives as input, being the context used to communicate with the device.
The Input env can be populated with the value “PRD” since it is ignored by the SDK.
Below, we identify the input with the init method:
Name
Description
Format
Mandatory
application
Application
Application
Yes
env
Environment
String
Yes
Step 3: Printing the receipt in the SDK
This feature allows the use of the integrated printer within terminal devices, to print receipts. Thus, being possible to configure the content, the source and organization of the elements.
The printer can print both text and images.
An app can call the print method to print receipts.
Here we provide you input that should be passed on when invoking the print method:
Name
Description
Format
Mandatory
printerLineList
Data de generate the receipt
List
Yes
The input PrinterLineList contains the following object fields:
Name
Description
Available values
Format
Mandatory
getAlignment
Defines text alignement.
The field is ignored if fields valueRight and valueLeft are populated for the same line of text and will only be considered if field valueRight is the only one populated.
‘0’: aligned to the left; ‘1’: centered ‘2’: aligned to the right
Integer
Yes
getFontsize
Defines font size.
If the field type is populated with the value ‘1’, this field is ignored.
‘0’: aligned to the left; ‘1’: centered; ‘2’: aligned to the right
Integer
Yes
getType
Defines the type of content in a line.
‘0’: concerning the presentation of the text; ‘1’: concerning the presentation of images
If an image is presented, field valueRight must be populated with a base64 of an image
Integer
Yes
getValueLeft
Defines the text on the left.
In some cases, it can take the form of the description of the value presented to the right.
The value of this field will only be presented if the receipt also has a valueRight.
On the template, this value is populated with one of the available placeholders, which will later be replaced by the real value to be presented on the receipt.
String
Yes
getValueRight
Defines the text on the right. This field might be used with or without the field valueLeft being defined.
If valueLeft is populated, the value of this field will be presented aligned to the right. If field valueLeft is not populated, the value of this field will be presented in the position established by field alignment. As the previous field, it is populated in the template with a placeholder from a list of possible placeholders, which will later be replaced by the real value on the receipt.
String
Yes
The Outputs of the printerSDKresult are:
Name
Description
Format
PrinterSDKResultType
Error description
Enum
result
Result
Boolean
The printerSDKResultType‘s results:
Name
Description
Format
Success
Success
True
Paper Out
Printer needs paper
False
Error
Generic Error
False
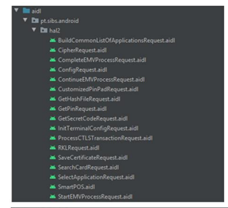
Below we provide an example of the SmartPOS aidl. :
The first step consists of creating the SmartPOS.aidl aid. The AIDL service is identical to a Windows DLL: it is running on the Android system and can be consumed by any application, as long as it shares the same messaging contract: https://developer.android.com/guide/components/aidl.
To use this service, the app that invokes it must have declared and AIDL file with the methods that the service provides. This file is the same in the service and in the app, and in both cases, must be in the same Package.
// SmartPOS.aidl
package pt.sibs.android,hal2;

// Declare any non-default type here with import statements

interface SmartPOS {
    /**
     * Demonstrates some basicy types that you can use as parameters
     * and return values in AIDL.
     */
     void_printerReceipt(String text);
}
The methods will be available only after the first build.
Step 2: Connect with the service
When starting the app or feature that needs to use the service, a BroadcastReceivermust be created to receive the intentscoming from the service. For that, we can create a class that extends BroadcastReceiver, by following the next example:
public class Hal2Receiver extends BroadcastReceiver {

    @Override
    public void onReceive (Context context, Intent intent) {
        String type = intent.getStringExtra ("type");
        String sender = intent.getStringExtra ("sender");
        String content = intent.getStringExtra ("content");

        switch (type) {
            case "TO CORE":
            ToCoreEvent event = JsonBuilder.fromJsonConverted(content,
ToCoreEvent.class);
            // EVENT
            return;

            case "RESPONSE_TO_CORE":
            // RESPONSE
            return;
        }

}
Whenever using the HAL2 service, you must perform a bindService and, at the end, unbindService, otherwise multiples instances may appear in the service itself, causing memory leak.
public class Hal2Util {

    public static final String TAG = "Hal2Util";
    public static final String HAL_PACKAGE = "pt.sibs.android.hal2";

    static void bindSmartPosSercive (Hal2ServiceConnection connection) {
        Intent intent = new Intent (HAL_PACKAGE + ".SMART_POS");
        intent.setPackage (HAL_PACKAGE);

        ApplicationLib.getContext().bindService(intent, connection.getServiceConnection (), Context.BIND_AUTO_CREATE);
    }

    static void unbindSmartPosService (Hal2ServiceConnection connection) {
    of (!connection.isBound()) return;

        ApplicationLib.getContext ().unbindService(connection.getServiceConnection ());
    connection.unbound ();
    }
}
You must register and unregister the service after bindService and before unbindService.
The ServiceConnection variable used in bindService can be declared as shown in the following sample:
public class Hal2ServiceConnection implements ServiceConnection {
    private final String TAG = "Hal2ServiceConnection";
    private SmartPOS service;
    private boolean mBound = false;

    void unbound() {
      mBound = false;
    }

    boolean isBound() {
      return = mBound;
    }

    ServiceConnection getServiceConnection() {
      return this;
    }

    public SmartPOS getService() {
      return service;
    }

    @Override
    public void onServiceConnected(ComponentName componentName, IBinder iBinder) {
      Log.d(TAG, "onServiceConnected");
      service = SmartPOS.Stub.asInterface(iBinder);
      mBound = true;
    }

    @Override
    public void onServiceDisconnected(ComponentName componentName) {
      Log.d(TAG, "onServiceDisconnected");
      unbound ();
   }

}
To check if the service is running, the following method can be used. In this method, the service names whose status we want to know is provided and, as a result, a Boolean is returned indicating if the service is running.
Upon ending the service, if you leave the context where it was used (for example: destroy the activity/fragment), you shall unbind the service and unregister the receiver.
HAL2 responds via broadcastReceiver. The Intent object has identifiers that indicate whether the message is of the Event Type or the Response Type. If it is an Event, a message may be displayed to the user as the process has yet to finish. If it is a response, it means that it is the final response to the request executed by the application.
The Identifiers returned in the intent are:
Type: Type of Return
TO_CORE: Event
RESPONSE_TO_CORE: Response
Sender: Name of the service executed by the application
Content: Json object in string format, which contains the ToCoreEvent object or the response object to the executed request
After a successful bind to the service, the methods can be invoked. The method that must be used to print a receipt on the equipment is _printReceipt. This method receives a JsonArray where each JsonObject contains the text/image to be displayed on the receipt. The JsonObject has the following fields:
Font size
Text alignment (Left – 0; Center – 1 ; Right -2)
Type of content (Text – 0; Image – 1)
Text on the left
Text on the right
The default text, if only one text is required, is the one on the right. Images must be converted to base64.
@Override
public void printReceipt(String receipt) {
    executeHal(new HalRunner() {
      @Override
      public void execute() throws RemoteException {
          serviceConnection.getService()._printReceipt(receipt);
      }
    });
}
After executing the request to print the receipt, HAL2 respond via a ToCoreEvent object with the following error codes:
Error Code
Definition
0x0001
No paper
0x0002
Paper Jam
0x0003
Printing
Object ToCoreEvent of the HAL:
class ToCoreEvent {
    int eventCode;
    int messageIdentifier;
    string languagePreference;
    int holdTime;
    int source;
}
When printing is finished, HAL2 returns a PrintReceiptResponse object in response to the print request with the following possible outcomes:
Error Code
Definition
0x0000
Successful print
0x0001
No paper
0x0002
Paper Jam
0xFFFF
Other errors
Object PrintReceiptResponse:
class PrintReceiptResponse {
    int source;
}
Below, you can find an example of a JsonArray to be printed:
public class PrinterStringObject {
    // { "valueLeft": , "valueRight": "%LOGO", "fontsize": 1, "alignment":1, "flag": false, "type": 1 },
    public String valueLeft;
    public String valueRight;
    public int fontsize;
    public int alignment;
    public int type;
}
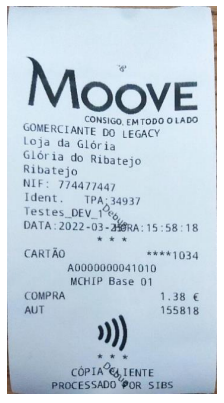
The following image shows an example of a printed receipt from the SmartPOS:
The call to the SmartPOS app is made through an Intent which contains a bundle with the necessary information. The data sent to the SmartPOS can be viewed in the following code example:
private Intent createPendingIntent(String reference, String value, String apiToken, String apiTokenId, String gratuityAmount){
    Intent launchIntent = new Intent();

    //Package of Smartpos that will be called
    launchIntent.setClassName("pt.sibs.android.mpos.sibsPagamentosQLY.NexGo”, "pt.sibs.android.mpos.sibsPagamentosQLY.NexGo.activities.MainActivity");

    TaskStackBuilder stackBuilder = TaskStackBuilder.create(this);
    stackBuilder.addNextIntent(launchIntent);

    // create a json with value and reference
    MessageToSend messageToSend = new MessageToSend();
    value = value.replaceAll("[^\\d.]", "");
    messageToSend.setAmmount(value);
    messageToSend.setReference(reference);

    messageToSend.setGratuityAmount(gratuityAmount);
    Gson gson = new GsonBuilder().create();
    String message = gson.toJson(messageToSend,MessageToSend.class);

    // convert json to a Base64
    byte[] bytes;
    bytes = message.getBytes(StandardCharsets.UTF_8);
    String base64msg = Base64.encodeToString(bytes, Base64.DEFAULT);

    // create a bundle and intent to call mpos and send data over
    Bundle data = new Bundle();
    data.putString(PACKAGE_ID, BuildConfig.APPLICATION_ID);
    data.putBoolean(REQUEST_RESPONSE, sw.isChecked());
    data.putBoolean(BYPASS_INSERT_VALUE, bypassSw.isChecked());
    data.putBoolean(EDITABLE_REFERENCE, editReferenceSw.isChecked());
    data.putBoolean(CALL_IN_APP_FECHO, fechoSw.isChecked());

    data.putString(API_TOKEN, apiToken);
    data.putString(API_TOKEN_ID, apiTokenId);
    data.putString(BASE64REFERENCE,base64msg);
    data.putInt(REQUEST_KEY, activityRequestCode);
    data.putInt(AUTO_CLOSE_RECEIPT_TIME, 1000);
    data.putInt(AUTO_CLOSE_RECEIPT_SCREEN,true);
    launchIntent.setFlags(Intent.FLAG_ACTIVITY_SINGLE_TOP);
    launchIntent.putExtra(DATA_MPOS, data);

    return launchIntent;
}
The example above illustrates a method that, in the end, returns an Intent with the necessary information.
Initially the Intent is created and the “setClassName” method, the SmartPOS Package and the Activity to be called are configured – in the case above, the MainActivity.
Subsequently an object of the MessageToSend type is created. In this object, values are assigned to the reference and amount fields.
After creating the object and filling in the values of both fields, the object is converted to json, using the Gson lib, and then the encoding of the string json is made to Base64. After filling the object, we can create the Bundle to be passed along with the Intent.
The Bundlemust contain the following elements:
A Stringwith the Application IDof the app which is calling the SmartPOS;
Boolean valuesindicating:
Whether the app requires a response from the SmartPOS;
Allows to edit the amount and reference;
Whether it will execute a Closure instead of a Purchase;
Whether the app should close after presenting the success screen/receipt to the Customer;
A Stringwith the Base64-encoded JSON data;
A String that indicates the operation type (if applicable);
A String with the original transactionID (if applicable);
An Integer valued used in the StartActivitythat will use the Intentcreated by this method;
An integer value with the time limit until which the application should display the success/receipt screen to the user. After this time, the application closes and returns the information to the Integrated application.
After creating the Bundle, the Flag Activity Single Top flag is set on the Intent and the Bundle is added to the Intent, returning it to be used elsewhere.
The development and production packages will be made available to developers once the integration journey initiates.
The Developers who develop applications for SmartPOS of different EATs (TSes) must implement mechanisms that guarantee their correct operation, regardless of the terminal where the feature is installed.
For that purpose, the Developers must consider the following conditions:
Each SmartPOS terminal has one single payment app installed;
The Developer feature should check the payment app/Package is on the SmartPOS terminal. One possible approach is to perform this check on the first start-up of the feature after it has been installed on the terminal.
Step 2: Define the object class MessageToSend
In this object, the following fields must be populated:
amount:this field contains the operation amount and is represented in cents. Example: for a €10 purchase, the amount must be populated with ‘1000’. This field type is String;
reference:this field informs the reference associated to the operation. It is of the String type, 25- character length (maximum). May contain alphanumeric values.
gratuity value: the field contains the gratuity value and is represented in cents. Example: for a purchase with the gratuity value of 1€, the gratuity value must be populated with “100”. This field type is String.
After the execution of the operation, a response can be received from the SmartPOS, if the flag corresponding to the key “REQUEST_RESPONSE” marks the value true.
The following example illustrates how to read the response if it comes via onActivityResultor onNewIntent:
@Override

protected void onNewIntent(Intent intent) {
    String status = "";
    String errorCode = "";
    String date = "";
    String reference = "";
    String amount = "";
    String paymentJson = "";
    String mbwayDataJson = "";
    String rtExpDate = "";
    String gratuityAmount = "";
    PaymentCallInAppData paymentCallInAppData = new PaymentCallInAppData();
    MBWayCallInAppData mbwayCallInAppData = new MBWayCallInAppData();

    // Get response from mpos
    if (intent != null && intent.getExtras() != null) {
        if (intent.getExtras().containsKey(CALLIN_ERROR_KEY))
        errorCode = intent.getExtras().getString(CALLIN_ERROR_KEY);

        if (intent.getExtras().containsKey(CALLIN_STATUS_KEY))
        status = intent.getExtras().getString(CALLIN_STATUS_KEY);

        if (intent.getExtras().containsKey(CALLIN_DATE_KEY))
        date = intent.getExtras().getString(CALLIN_DATE_KEY);

        if (intent.getExtras().containsKey(CALLIN_AMOUNT_KEY))
        amount = intent.getExtras().getString(CALLIN_AMOUNT_KEY);

        if (intent.getExtras().containsKey(CALLIN_REF))
        reference = intent.getExtras().getString(CALLIN_REF);

        if (intent.getExtras().containsKey(CALLIN_PAYMENT_RESPONSE)) {
            paymentJson = intent.getExtras().getString(CALLIN_PAYMENT_RESPONSE);
            paymentCallInAppData = (PaymentCallInAppData) JsonBuilder.fromJson(paymentJson, PaymentCallInAppData.class);
        }

        if (intent.getExtras().containsKey(CALLIN_REFRESH_TOKEN_EXP_DATE))
        rtExpDate = intent.getExtras().getString(CALLIN_REFRESH_TOKEN_EXP_DATE);

        if (intent.getExtras().containsKey(CALLIN_GRATUITY_VALUE))
        gratuityAmount = intent.getExtras().getString(CALLIN_GRATUITY_VALUE);

        if(data.getExtras().containsKey(CALLIN_MBWAY_CLIENT_DATA)) {
        mbWayClientDataJson = data.getExtras().getString(CALLIN_MBWAY_CLIENT_DATA);

        if(data.getExtras().containsKey(CALLIN_MBWAY_CLIENT_DATA)) {
            mbWayClientDataJson = data.getExtras().getString(CALLIN_MBWAY_CLIENT_DATA);
            mbwayCallInAppData = (MBWayCallInAppData) JsonBuilder.fromJson(mbWayClientDataJson, MBWayCallInAppData.class);

        Toast.makeText(getApplicationContext(), "STATUS1: "+status+"\nError: "+errorCode+
            "\nAmount: "+ amount +"\nGratuity Value: "+gratuityAmount +"\nDate:
            "+date+"\nReference: "+reference+"\nRT Exp: "+ rtExpDate+"\nPayment Data:
            "+paymentJson, Toast.LENGTH_LONG).show();
        }
        super.onNewIntent(intent);
    }

@Override
protected void onActivityResult(int requestCode, int resultCode, @Nullable Intent data) {
    super.onActivityResult(requestCode, resultCode, data);
    if (requestCode == activityRequestCode) {
        String status = "";
        String errorCode = "";
        String date = "";
        String reference = "";
        String amount = "";
        String paymentJson = "";
        String mbwayDataJson = "";
        String rtExpDate = "";
        String gratuityAmount = "";
        PaymentCallInAppData paymentCallInAppData = new PaymentCallInAppData();
        MBWayCallInAppData mbwayCallInAppData = new MBWayCallInAppData();

        if (data != null && data.getExtras() != null) {
        }
    }
}
Either case, an Intentis received containing a Bundle filled by the SmartPOS with the response data.
After validating that the Intent exists and contains the Bundle, the values of each Keywill be obtained, if present.
The response returns 8 values, detailed on the following tables:
Values
Description
String type
errorCode
Corresponds to the error code (if any) obtained by the SmartPOS while performing the operation.
CALLIN_ERROR_KEY
status
Informs the status of the operation performed by the SmartPOS, which can be: DeviceError Success Declined CommError Usercancelled UserTimeOut Missing Credentials
CALLIN_STATUS_KEY
date
Informs the date when the operation was performed by the SmartPOS.
CALLIN_DATE_KEY
amount
Corresponds to the value used in the operation performed in SmartPOS, can be used to compare with the value sent in the bundle which invoked the SmartPOS app. It is of String type.
CALLIN_AMOUNT_KEY
reference
Corresponds to the reference used in the operation performed in the SmartPOS, can be used to compare with the value sent in the Bundle which invoked the SmartPOS app.
Corresponds to a JSON with the data of the payment operation performed by the SmartPOS and can be easily used when converted to a PaymentCallInAppData object.
CALLIN_PAYMENT_RESPONSE
Token expiration date
Corresponds to the token’s expiration date timestamp.
Corresponds to a json with the MB WAY information used in the operation performed in the SmartPOS – TIN and email – that can be sent as a response to a payment with QR code.
Corresponds to a JSON with the information of the accounting closure operation performed by the SmartPOS and can be easily used when converted into a ReconciliationCallInAppData object.
CALLIN_RECONCILIATION_RESPONSE
transactionID
This value corresponds to the transaction identification in SIBS’ systems. This value will be useful to perform the following transaction types: refund, incremental, purchase after authorisation, partial cancellation and authorisation cancellation.
List with the total types of transactions (purchase; refund).
financialTotalsItems
List <ReconciliationItemCallInAppData>
List with the total type of the payment methods, including comissions.
merchantTotals
ReconciliationItemCallInAppData
Reconciliation totals
resultStatus
string
Status
sdkDateTime
string
Date at which Reconciliation was performed
sdkID
string
ID used by the application (can be shared with SIBS, for analysis purposes)
serverDateTime
string
Date at which Reconciliation was performed in the central system
serverID
string
ID used by the application (can be shared with SIBS, for analysis purposes)
terminalCode
integer
TPA ID
wasOnline
boleean
Identifies if operation was made online
errorCode
integer
Error code
periodID
integer
Period Number- possible values (1-99, cyclic)
Reconciliation Item Call In App Data
The used keys are exemplified on the code below:
Name
Format
Description
paymentName
string
Financial Transaction Type
nrTotalTransactions
double
Total number of operations
TotalPaymentsAmount
double
Total value of every transaction
TotalPaymentsCurrency
string
Currency at which reconciliation was performed (PLN or EUR)
Financial Reconciliation Item Call In App Data
Name
Format
Description
ComissionTotals
double
Commission associated to each payment methods
The used keys are exemplified on the code below:
final static String DATA_MPOS = "DATA_MPOS"; //key with name of bundle
final static String PACKAGE_ID = "PACKAGE_ID"; //key with caller package id
final static String BASE64REFERENCE = "BASE64REFERENCE"; //key for base64 sent to mpos
final static String REQUEST_RESPONSE = "RETURN_VALUE_BOOLEAN"; //key with boolean indicating if response is required
final static String BYPASS_INSERT_VALUE = "lockAmountValue"; //indicates if the amount is editable in mpos
final static String EDITABLE_REFERENCE = "EDITABLE_REFERENCE"; //indicates if the reference is editable in mpos
final static String CALL_IN_APP_FECHO = "performAutomaticClose"; //boolean that if set true, executes "fecho"
final static String REQUEST_KEY = "REQUEST_KEY"; //activity request key
final static String CALLIN_ERROR_KEY = "CALL_IN_ERROR"; //key for response field : error
final static String CALLIN_STATUS_KEY = "CALL_IN_STATUS"; //key for response field : status
final static String CALLIN_AMOUNT_KEY = "CALL_IN_AMOUNT"; //key for response field: amount
final static String CALLIN_DATE_KEY = "CALL_IN_DATE"; //key for response field: date
final static String CALLIN_REF = "CALL_IN_REF"; //key for response field: reference
final static String CALLIN_PAYMENT_RESPONSE = "CALLIN_PAYMENT_RESPONSE"; //key for response field: payment data final static String
final static String CALLIN_REFRESH_TOKEN_EXP_DATE = "CALLIN_REFRESH_TOKEN_EXP_DATE"; //key for response field: token expiration date
final static String CALLIN_GRATUITY_VALUE = "CALLIN_GRATUITY_VALUE"; //Key for response field: gratuity value
final static String CALLIN_MBWAY_CLIENT_DATA = "CALLIN_MBWAY_CLIENT_DATA"; //Key for response field: mbway client data
final static String OPERATION_TYPE = "OPERATION_TYPE"; //define transaction type
final static String AUTHORISATION_CODE = "AUTOHRISATION_CODE"; //original transaction ID
final static String AUTHORISATION_TYPE = "AUTHORISATION_TYPE"; //define authorization type
final static String CALLIN_TRANSACTION_ID = "CALLIN_TRANSACTION_ID"; //original transaction ID return on original transaction
Below you can find a table with the Used Keys and correspondent definition.
Used keys
Key definition
DATA_MPOS
Corresponds to the name of the Bundleused to call the SmartPOS app
PACKAGE_ID
Contains the application ID of the app which is calling the SmartPOS
BASE64REFERENCE
Corresponds to the value in base 64 of the JSON created from the object MessageToSend with the amount and reference values populated
REQUEST_RESPONSE
Corresponds to the flag which indicated whether the app that is invoking the SmartPOS requires a response
BYPASS_INSERT_VALUE
Key corresponding to the flag which indicated whether the app allows to edit the amount value
EDITABLE_REFERENCE
Key corresponding to the flag which indicates whether the app allows to edit the reference
REQUEST_KEY
Corresponds to the Int value used in the StartActivity that used the created intent
CALLIN_ERROR_KEY
Used in case of response corresponding to the error (if any) obtained by the SmartPOS while performing the operation
CALLIN_STATUS_KEY
Used in case of response and it informs the status of the operation performed by the SmartPOS (success, declined, etc.)
CALLIN_AMOUNT_KEY
Used in case of response and corresponds to the amount of the operation performed in the SmartPOS
CALLIN_DATE_KEY
Used in case of response and it informs the date when the operation was performed in the SmartPOS
CALLIN_REF
Used in case of response and it contains the reference used in the operation performed in the SmartPOS
CALL_IN_APP_FECHO
Corresponds to the flag indicating whether the app will perform a closure (“fecho”, in Portuguese) instead of a purchase
CALLIN_PAYMENT_RESPONSE
Key used in case of a response, corresponding to the data of the payment operation performed by the SmartPOS
CALLIN_REFRESH_TOKEN_EXP_DATE
Key used in case of a response, corresponding to the timestamp of the SmartPOS session token’s expiry date
CALLIN_GRATUITY_VALUE
Key used in case of a response, correspondent to the gratuity value
CALLIN_MBWAY_CLIENT_DATA
Key used in case of a responses correspondent to the MB WAY information used in the operation performed in the SmartPOS
API_TOKEN
Key used to export the authentication token of the payment app. This token was generated through the backoffice or the application. The token contains the information of the User who generated it. The token generation is done through the tab “Manage API Key”. This must be transmitted in JWT format (base64 with dot dividers, such as header. Body. Trailer). The token generated through the backoffice or the application is provided in the format expected by the payment application
API_TOKEN_ID
Key used to transport the authentication ID. It is used by the partner application- The API_Token_ID is in string format.
CALLIN_RECONCILIATION_RESPONSE
Key used in case of a response correspondent to the reconciliation operation performed in the SmartPOS
AUTO_CLOSE_RECEIPT_SCREEN
Key used to indicate to the payment application whether the success/receipt screen should be closed automatically. By default, if the variable is not sent, the application will maintain the current behavior waiting for the Merchant to close the success/receipt screen before returning the response to the Integrator application. Possible values: TRUE: The application will automatically close one second after the transaction is successfully completed. FALSE: Current behavior, meaning the application will only close after the Merchant closes the success/receipt screen.
AUTO_CLOSE_RECEIPT_TIMER
Key used to indicate how long the success/receipt screen should be displayed to the user. This timer will be necessary if the Integrator application wants to display the screen for more than one second, giving the user the possibility to print/send the receipt. The values to be passed in this field must be in milliseconds (1s = 1000ms).”
OPERATION_TYPE
Key used to inform the transaction type.
AUTHORISATION_ID
Key used to inform the transaction ID that will be applied to the next transaction.
AUTHORISATION_CODE
Key used to inform the authorisation type that will be applied, if OPERATION_TYPE contains the value AUTH.
CALLIN_TRANSACTION_ID
Key used to return the transaction identifier in SIBS’ systems.
Rules for implementing automatic closing of the application:
If the AUTO_CLOSE_RECEIPT_SCREEN variable is set to ‘TRUE’ and the AUTO_CLOSE_RECEIPT_TIMER variable is not sent, the default value for displaying the success/receipt screen will be one second.
If the Integrator wants to allow the user to send the receipt, it will be their responsibility to fill in the AUTO_CLOSE_RECEIPT_TIMER key with a suitable value for this purpose.
If the Merchant has set up automatic printing of the Merchant’s receipt in the application (a setting available in the payment application settings), the timer (AUTO_CLOSE_RECEIPT_TIMER) will only start being considered after the receipt is printed.
If the user clicks on the print options, the timer will stop and will be restarted once the printing is finished.
Other workflows desired by the Integrator should take into account the need to adjust the timer value to achieve the desired effects.
As of version 1.21 of the payment application, the following transactions are available via app to app
Refund;
Authorisation (GENERAL);
Purchase after authorisation;
Incremental after authorisation;
Partial cancellation after authorisation;
Authorisation cancellation.
As backwards compatibility, the main transaction will be the purchase, that is, if the OPERATION_TYPE field indicating the authorisation type is not passed, the payment application will execute the purchase flow To differentiate the available transaction types, it is necessary to add the OPERATION_TYPE key and the AUTHORISATION_ID key to the DATA_MPOS bundle, both values being of the string type. The transaction amount must be sent in the amount field.
The OPERATION_TYPE key values are described below:
REF – Refund
AUTH – Authorisation
CAUT – Partial cancellation after authorisation
CAPT – Purchase after authorisation
IAUT – Incremental after authorisation
AAUT – Authorisation cancellation
Refunds are made on the original transaction; therefore, the Integrator application is responsible for storing the original transaction data and must populate the value of the AUTHORISATION_CODE key with the original transaction ID (CALLIN_TRANSACTION_ID).
When the payment application receives the OPERATION_TYPE with the values REF, CAUT, CAPT, IAUT or AAUT, it will open the screen containing the transaction details, showing the User the actions that can be carried out.
When the payment application receives the OPERATION_TYPE with the value AUTH and the AUTHORISATION_TYPE field with the value GENERAL, the payment screen opens directly with the amount sent in the amount field, if the lockAmountValue field is set to FALSE. In the refund flow, if the field lockAmountValue is set to TRUE, the refund screen opens directly with the amount blocked, and the Merchant will be asked to enter their password so that the flow can continue.
If the Merchant does not support authorisations for the selected terminal, the error OPERATION_NOT_SUPPORTED will be returned.
If the transaction is not found, the payment application will return the status CommError with the error code: “Unable to find the transaction {TransactionID}“.
The following errorCodes have been added:
OPERATION_NOT_SUPPORTED
Error returned in the field errorCode whenever the terminal selected for the Merchant does not support the transaction executed by the Integrator application.
TRANSACTION_WITHOUT_AVAILABLE_AMOUNT_TO_REFUND
Error returned in the field errorCode whenever the amount of the original transaction is not enough to carry out the refund.
INVALID_AUTHORISATION_CODE
Error returned in the field errorCode whenever the transaction is of type REF, CAUT, CAPT, IAUT or AAUT and the AUTHORISATION_CODE field is null or void.
AMOUNT_NULL
Error returned together with the DECLINED status whenever a null amount was sent and the field lockAmountValue has the value TRUE.
Create, Re-generate and Delete Token
The API Token is important when activating the service of Single Sign On. For this purpose, you will have to access the SIBS Payment Application Backoffice through a Web Browser.
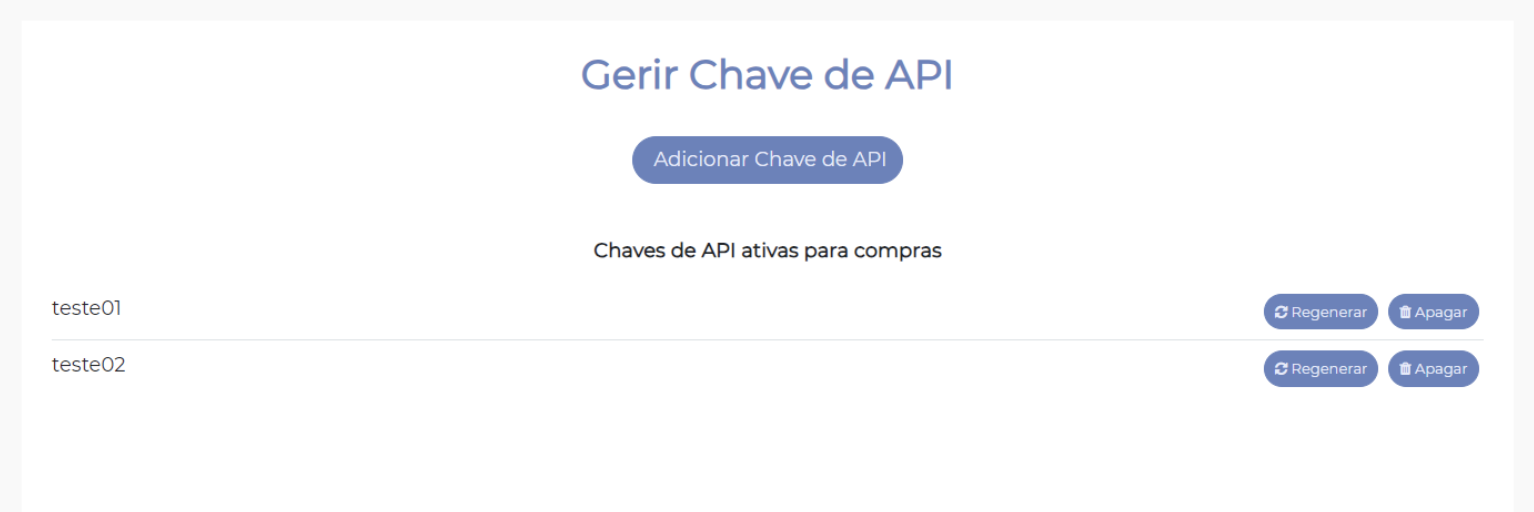
The API key menu allows the configuration of Single Sign On (SSO) authentication intended to allow the User a secure login to the partner application (such as business app or invoicing apps) without the need to login to the payment application.
On accessing this menu page, the User will be shown the list of API Keys that are currently active as per the following figure:
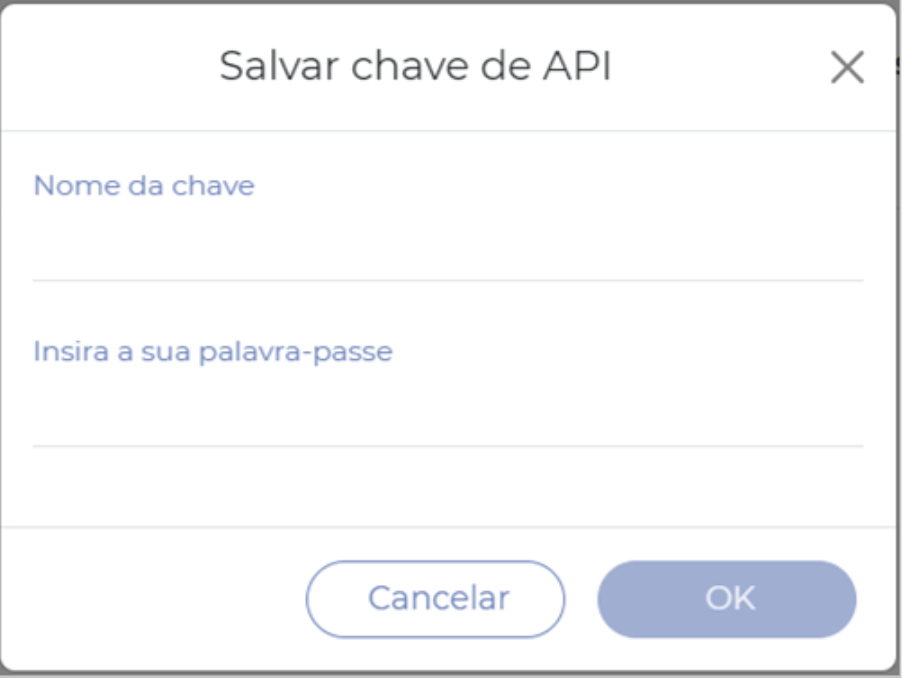
To create a new API Key, the user should use the “Add API Key” button, available at the top of the page. Clicking on this button opens a window where the user must enter the following data to create the token:
Key Name (optional)
Password (mandatory)
Since the “Key name” is an optional field, it does not need to be filled in. In these cases, a name will be automatically generated by the backend. This “key name” field is to help you identify the token in use.
After entering the required data, a success message will be displayed for token creation and a file with the token and the token ID will be automatically downloaded. This file has a JSON with the following structure:
There is a validation at the “Key Name” level. If the User tries to create a token with the name of an existing key, the following error message will be displayed: “A token with the specified if already exists, each token must have a unique name.”
Please note that re-generating a token will not invalidate tokens that have been previously generated.
The key can be renewed on the “Re-generate” butting, that is, this button creates a new key for a given API Token. The next steps will be to simply enter the account password, which will trigger the automatic download of the file with the re-generated token. Since it is a token obtained with an ephemeral key, it will be different from the originally generated token.
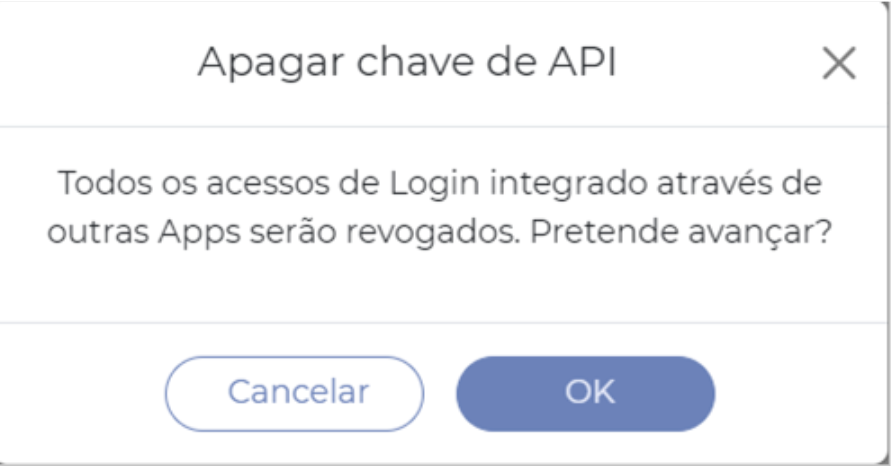
The Delete button shall be used to revoke an existing token. This functionality will cause the selected token to be deleted, rendering it invalid. For security reasons a warning message is displayed before the User starts the token deletion process.
If the action is confirmed, the token deletion process will start, and the user sill only need to enter the password to complete the process.
Once completed, the token will be deleted, hence becoming invalid for use in any application. The deleted token shall be removed from the list of active keys and cannot be re-generated.
If the user logged in to the application does not have access to the token used, they will be redirected to logout. The user will then need to log in again manually through the application, using the credentials for which the token was generated.
If the user changes the password, it will be necessary to replace all the tokens generated with it. Session tokens will become inoperative, in case of a change in the User’s account.
Once the token is created, it can be used to authenticate the partner application, through the app to app call. As long as the token is valid, the User won’t be logged out of the payment apps and all the requests will be authenticated with the token.
SIBS payment application installed on SmartPOS also has the app-to-app integration. This means that other applications are allowed to invoke SIBS Payment Application, using input parameters that, in turn, will trigger the available payment operations.
The services supported by the SmartPOS App to App integration are:
Payment request
Used to prompt payment from the customer for a specific amount.
Batch closure request
Used to close an active batch in the SIBS Payment App, which is especially useful for reporting purposes.
Send Reference request
Used to inform the reference associated to the operation.
Single sign on
Used to allow the user a secure login to the partner application without the need to login into the payment application.
This section describes the steps required to perform an “app to app” call on Android applications. The technical development process consists of 3 different steps:
Communication with the SoftPOS application is done by using Android intents. This means that the call to the SoftPOS by an Android app is made through an Intent which contains a bundle with the required information for the transaction.
The data sent to the SoftPOS can be found in the following code sample:
private Intent createPendingIntent(String reference, String value){
    Intent launchIntent = new Intent();

    //Package of Smartpos that will be called
launch.Intente.setClassName(“pt.sibs.android.mpos.sibsPagamentosQly”,”pt.sibs.android.mpos.activities.MainActivity”);

    TaskStackBuilder stackBuilder = TaskStackBuilder.create(this);
    stackBuilder.addNextIntent(launchIntent);

    // create a json with value and reference
    MessageToSend messageToSend = new MessageToSend();
    value? value.replaceAll(“[^\\d.]”, ””);
    messageToSend.setAmount(value);
    messageToSend.setReference(reference);
    Gson gson = new GsonBuilder().create();
    String message = gson.toJson(messageToSend,MessageToSend.class);

    // create json to a Base64
    byte[] bytes;
    bytes = message.getBytes(StandardCharsets.UTF_8);
    String base64msg = Base64.encodeToString(bytes, Base64.DEFAULT);

    // create a bundle and intent to call mpos and send data over
    Bundle data = new Bundle();
    data.putString(PACKAGE_ID, BuildConfig.APPLICATION_ID);
    data.putBoolean(REQUEST RESPONSE, sw.isChecked());
    data.putBoolean(BYPASS_INSERT_VALUE, bypassSw.isChecked());
    data.putBoolean(EDITABLE_REFERENCE, editReferenceSw.isChecked());
    data.putBoolean(CALL_IN_APP_FECHO, fechoSw.isChecked());
    data.putString(BASE64REFERENCE, base64msg);
    data.putInt(REQUEST_KEY, activityRequestCode);
    launchIntent.setFlags(Intent.FLAG_ACTIVITY_SINGLE_TOP);
    launch.Intent.putExtra(DATA_MPOS, data);

    return launchIntent;
}
The example illustrates a method that in the end returns an Intentwith the necessary information. The Intent is created first, then the setClassName method is used to configure the SoftPOS Packageand the Activitythat will be invoked, in this case MainActivity. The name of the Activityto be used in the “app to app” call is: pt.sibs.android.mpos.activities.MainActivity.
After configuring the Intent, an object of a custom type called MessageToSend is created.
This object is used to hold values for the “reference”, “amount” and “gratuityAmount” fields, which are required for the SoftPOS transaction.
After creating the object and filling in the values of both fields, the objectis converted to json, using the Gson lib , and then encode the json stringinto Base64.
After filling the object, we can create the Bundle to be passed along with the Intent. The Bundle must contain the following elements:
A String with the Application ID of the app which is calling the SoftPOS;
Boolean values indicating whether the app requires a response from the SoftPOS; allows to edit the amount and reference; whether it will execute a Closure instead of a Purchase;
A String with the Base64-encoded JSON data;
An Integer value used in the StartActivity that will use the Intent created by this method.
String indicating the operation type (where applicable);
String with the original transaction ID (where applicable).
When the Bundle has been created, the FLAG_ACTIVITY_SINGLE_TOP flag is configured in the Intent. This flag is a configuration setting for the intent that specifies how the Activity should behave when it’s started. The keys used in the Bundle will be described further down in this guide. The development and production packages will be made available to developers once the integration journey initiates.
The development and production packages will be made available to developers once the integration journey initiates.
Step 2: Define the object class MessageToSend
In this object, the following fields must be populated:
amount:this field contains the operation amount and is represented in cents. Example: for a €10 purchase, the amount must be populated with ‘1000’. This field type is String;
reference:this field informs the reference associated to the operation. It is of the String type, 25- character length (maximum). May contain alphanumeric values.
gratuityAmount: this field contains the amount of the gratuity related to the operation and is represented in cents. Example: for a purchase with a gratuity of €1, the value gratuityAmount must be populated with ‘100’. This field is of the String type.
Here is a code sample of the Class Message to send:
After the execution of the operation, a response can be received from the SoftPOS, if the flag corresponding to the key “REQUEST_RESPONSE” marks the value true.
The following example illustrates how to read the response if it comes via on ActivityResult or on NewIntent:
@Override
protected void onNewIntent(Intent intent) {
    String status = "";
    String errorCode = "";
    String date = "";
    String reference = "";
    String amount = "";
    String mbwayDataJson = "";
    MBWayCallInAppData mbwayCallInAppData = new MBWayCallInAppData();

    // get response from mpos
    if(intent != null && intent.getExtras() != null) {

        if(intent.getExtras().containsKey(CALLIN ERROR KEY))
        errorCode = intent.getExtras().getString(CALLIN_ERROR_KEY);

        if(intent.getExtras().containsKey(CALLIN STATUS KEY))
        status = intent.getExtras().getString(CALLIN_STATUS_KEY);

        if(intent.getExtras().containsKey(CALLIN DATE KEY))
        date = intent.getExtras().getString(CALLIN_DATE_KEY);

        if(intent.getExtras().containsKey(CALLIN AMOUNT KEY))
        amount = intent.getExtras().getString(CALLIN_AMOUNT_KEY);

        if(intent.getExtras().containsKey(CALLIN REF))
        reference = intent.getExtras().getString(CALLIN_REF);

        if (intent.getExtras().containsKey(CALLIN_RECONCILIATION_RESPONSE)) {
                reconciliationtJson = intent.getExtras().getString(CALLIN_RECONCILIATION_RESPONSE);
                reconciliationCallInAppData =
(ReconciliationCallInAppData) JsonBuilder.fromJson(reconciliationJson,  ReconciliationCallInAppData.class);
            }

        Toast.makeText(getApplicationContext(), "STATUS2: "+status+"\nError: "+errorCode+"\nAmount: "+ amount + "\nDate: "+date+"\nReference: "+reference, Toast.LENGTH LONG).show());
    }
    super.onNewIntent(intent);
}

@Override
protected void onActivityResult(int requestCode, int resultCode, @Nullable Intent data) {
    if(requestCode == activityRequestCode) {
        String status = "";
        String errorCode = "";
        String date = "";
        String reference = "";
        String amount = "";
        String mbwayDataJson = "";
        String gratuity = "";
        MBWayCallInAppData mbwayCallInAppData = new MBWayCallInAppData();


        if(data != null && data.getExtras() != null) {
            if (data.getExtras().containsKey(CALLIN ERROR KEY))
            errorCode = data.getExtras().getString(CALLIN ERROR KEY);

            if (data.getExtras().containsKey(CALLIN_STATUS_KEY))
            status = data.getExtras().getString(CALLIN STATUS KEY);

            if (data.getExtras().containsKey(CALLIN_DATE_KEY))
            date = data.getExtras().getString(CALLIN DATE KEY);

            if (data.getExtras().containsKey(CALLIN_AMOUNT_KEY))
            amount = data.getExtras().getString(CALLIN DATE KEY);

            if (data.getExtras().containsKey(CALLIN_REF))
            reference = data.getExtras().getString(CALLIN REF);

            if(data.getExtras().containsKey(CALLIN_GRATUITY_KEY))
            gratuity = data.getExtras().getString(CALLIN_GRATUITY KEY);

            Toast.makeText(getApplicationContext(), "STATUS2: "+status+"\nError: "+errorcode+"\nAmount: "+ amount + "\nGratuity: "+ gratuity +"\nDate: "+date+"\nReference: "+reference, Toast.LENGTH LONG.show());
        }
    }
}
In either case, an Intent is received containing a Bundle filled by the SoftPOS with the response data.
After validating that the Intent exists and contains the Bundle, the values of each Keywill be obtained, if present.
The response returns 6 values, detailed on the following tables:
Value
Description
String Type
errorCode
Corresponds to the error code (if any) obtained by the SoftPOS while performing the operation
CALLIN_ERROR_KEY
status
Informs the status of the operation performed by the SoftPOS, which can be: DeviceError Success Declined CommError Usercancelled UserTimeOut Missing Credentials
CALLIN_STATUS_KEY
date
Informs the date when the operation was performed by the SoftPOS
CALLIN_DATE_KEY
amount
Corresponds to the value used in the operation performed in SoftPOS, can be used to compare with the value sent in the bundle which invoked the SoftPOS app
CALLIN_AMOUNT_KEY
reference
Corresponds to the reference used in the operation performed in the SoftPOS, can be used to compare with the value sent in the Bundle which invoked the SoftPOS app
CALLIN_REF
gratuityAmount
Corresponds to the amount of the gratuity in an operation performed by the SoftPOS. It can be used to compare with the amount sent in the Bundle that invoked the SoftPOS app
CALLIN_GRATUITY_KEY
transactionID
Corresponds to the transaction ID in the SIBS system. It must be populated for transactions that have been approved. This value will be useful for executing refund-type transactions.
Corresponds to a json with the MB WAY information used in the operation performed in the SoftPOS, an can be used when converting to an object MbWayCallInAppData.
Below you can find a table with the Used Keys and correspondent definition
Used keys
Key definition
DATA_MPOS
Corresponds to the name of the Bundle used to call the SoftPOS app
PACKAGE_ID
Contains the application ID of the app which is calling the SoftPOS
BASE64REFERENCE
Corresponds to the value in base 64 of the json created from the object MessageToSend with the amount and reference values populated
REQUEST_RESPONSE
Corresponds to the flag which indicated whether the app that is invoking the SoftPOS requires a response
BYPASS_INSERT_VALUE
Corresponds to the flag which indicated whether the app that is invoking the SoftPOS allows the change of the amount
EDITABLE_REFERENCE
Corresponds to the flag which indicated whether the app that is invoking the SoftPOS allow the change of the reference
REQUEST_KEY
Corresponds to the Int value used in the StartActivity that used the created intent
CALLIN_ERROR_KEY
Used in case of response corresponding to the error (if any) obtained by the SoftPOS while performing the operation
CALLIN_STATUS_KEY
Used in case of response and it informs the status of the operation performed by the SoftPOS (success, declined, etc.)
CALLIN_AMOUNT_KEY
Used in case of response and corresponds to the amount of the operation performed in the SoftPOS
CALLIN_GRATUITY_KEY
Used in case of response and corresponds to the amount of the gratuity in an operation performed in the SoftPOS . The value is of the String type.
CALLIN_DATE_KEY
Used in case of response and it informs the date when the operation was performed in the SoftPOS
CALLIN_REF
Used in case of response and it contains the reference used in the operation performed in the SoftPOS
CALL_IN_APP_FECHO
Corresponds to the flag indicating whether the app will perform a closure (“fecho”, in Portuguese) instead of a purchase
API_TOKEN
Used to export the authentication token of the payment app. This token is generated through the backoffice or payment app and contains the information of the User who generated it. The token generation is done through the tab “Manage API Key”. The token must be transmitted in JWT format (base64 with dot dividers, such as header.body.trailer) and is provided in the format expected by the payment application.
API_TOKEN_ID
Key used to transport the authentication token ID. It is used to identify the token used by the partner application. The value is of the String type. String token= “eyJhbGciOiJFQ0RILUVTIiwiZW5jIjoiQTEyOENCQy1IUzI1NiIsImVwayI6eyJrdHkiOiJFQyIsImNydiI6IlAtMjU2IiwieCI6IkdacEs5U0taUGxVTkpWR1JGMSswenlacVpXUGNNcUJSNmh1ODJTZVAxNGdcdTAwM2QiLCJ5IjoiQUszUjY3alpGYmQ1QTR6T013SnNLQVJ4WTY5MGo0bEJIQXdoWlZraHJrUEUiLCJleHQiOmZhbHNlfSwia2lkIjoidGVzdGVmaW5hbCJ9..122+VO2IJii+3oQhdQRgJw==.VGrKQuXL+VtCspmXVF1YXiREJvsSvivWUld+XPJjhbJWd4Fur5vVk7LQn7NK8W/+tC8P7f5mPkYTXAy374FJSA==.OFzZ03QZf/2btlJQwoAnhQ==”; String token_id =”token_test”; data.putString(API_TOKEN, token); data.putString(API_TOKEN_ID, token_id);
OPERATION_TYPE
Key used to indicate the transaction type
AUTHORISATION_CODE
Key used to inform the type of authorisation being applied, if OPERATION_TYPE is populated with AUTH.
CALLIN_TRANSACTION_ID
Key used to return the transaction ID in SIBS’s systems.
AUTO_CLOSE_RECEIPT_SCREEN
Key used to inform the payment app if it should close the success/receipt screen automatically. By default, if the variable isn’t sent, the app maintains its usual behaviour, which is waiting for the Merchant to close the success/receipt screen to return the response to the Integrator’s app. Possible values: TRUE: the app closes automatically one second after the transaction is completed successfully; FALSE: current behaviour, i.e., the app only closes after the Merchant closes the success/receipt screen.
AUTO_CLOSE_RECEIPT_TIMER
Key used to inform for how long the success/receipt screen is presented to the user. This timer is only necessary if the integrator wishes the app to show this screen for more than one second, giving the user the opportunity to print/send receipt. The values to be carried in this field must be formatted in milliseconds (1s=1000ms).
CALLIN_RECONCILIATION_RESPONSE
Key used in the response to the reconciliation request and corresponds to the information of the accounting period reconciliation operation carried out in the SoftPOS.
EXTERNAL_PED_ENABLED
Key with boolean value (TRUE/FALSE) for the functionality to hide the ‘Card’ button (external equipment) on the payment screen. “False” hides the button. “True” shows the button. If not sent, the button will be displayed by default.
Financial transactions
The following transactions are available via app to app:
Refund;
Authorisation (GENERAL);
Purchase after authorisation;
Incremental after authorisation;
Partial cancellation after authorisation;
Authorisation cancellation.
The OPERATION_TYPE key values are described below:
REF – Refund
AUTH – Authorisation
CAUT – Partial cancellation after authorisation
CAPT – Purchase after authorisation
IAUT – Incremental after authorisation
AAUT – Authorisation cancellation
Refunds are made on the original transaction; therefore, the Integrator application is responsible for storing the original transaction data and must populate the value of AUTHORISATION_CODE key with the original transaction ID (CALLIN_TRANSACTION_ID).
When the payment application receives the OPERATION_TYPE with the values REF, CAUT, CAPT, IAUT or AAUT, it will open the screen containing the transaction details, showing the User the actions that can be carried out.
When the payment application receives the OPERATION_TYPE with the value AUTH and the AUTHORISATION_TYPE field with the value e9e9f5, the payment screen opens directly with the amount sent in the amount field, if the lockAmountValue field is set to FALSE. In the refund flow, if the field lockAmountValue is set to TRUE, the refund screen opens directly with the amount blocked, and the Merchant will be asked to enter their password so that the flow can continue.
For refunds, whenever the error code is “10.108.0012”, the user must be presented with the text “Rejected transaction. Close the accounting period in terminal xxxx before carrying out the next operation. (error code)”, in which “xxxx” must be the terminal ID in the key terminalId.
New error codes
The following errorCodes have been added:
Value
Description
TRANSACTION_WITHOUT_AVAILABLE_AMOUNT_TO_REFUND
Error returned in the field errorCode whenever the amount of the original transaction is not enough to carry out the refund
INVALID_AUTHORISATION_CODE
Error returned in the field errorCode whenever the transaction is of type REF and the field AUTHORISATION_CODE is null or void
AMOUNT_NULL
Error returned together with the DECLINED status whenever a null amount was sent and the field lockAmountValue has the value ‘true‘
Single Sign On
The API Token is important when activating the service of Single Sign On. For this purpose, you will have to access the SIBS Payment Application Backoffice through a Web Browser.
The API key menu allows the configuration of Single Sign On (SSO) authentication intended to allow the User a secure login to the partner application (such as business app or invoicing apps) without the need to login to the payment application.
On accessing this menu page, the User will be shown the list of API Keys that are currently active as per the following figure:
To create a new API Key, the user should use the “Add API Key” button, available at the top of the page. Clicking on this button opens a window where the user must enter the following data to create the token:
Key Name (optional)
Password (mandatory)
Since the “Key name” is an optional field, it does not need to be filled in. In these cases, a name will be automatically generated by the backend. This “key name” field is to help you identify the token in use.
After entering the required data, a success message will be displayed for token creation and a file with the token and the token ID will be automatically downloaded. This file has a JSON with the following structure:
There is a validation at the “Key Name” level. If the User tries to create a token with the name of an existing key, the following error message will be displayed: “A token with the specified if already exists, each token must have a unique name.”
Please note that re-generating a token will not invalidate tokens that have been previously generated.
The key can be renewed on the “Re-generate” butting, that is, this button creates a new key for a given API Token. The next steps will be to simply enter the account password, which will trigger the automatic download of the file with the re-generated token. Since it is a token obtained with an ephemeral key, it will be different from the originally generated token.
The Delete button shall be used to revoke an existing token. This functionality will cause the selected token to be deleted, rendering it invalid. For security reasons a warning message is displayed before the User starts the token deletion process.
If the action is confirmed, the token deletion process will start, and the user sill only need to enter the password to complete the process.
Once completed, the token will be deleted, hence becoming invalid for use in any application. The deleted token shall be removed from the list of active keys and cannot be re-generated.
If the user logged in to the application does not have access to the token used, they will be redirected to logout. The user will then need to log in again manually through the application, using the credentials for which the token was generated.
If the user changes the password, it will be necessary to replace all the tokens generated with it. Session tokens will become inoperative, in case of a change in the User’s account.
Once the token is created, it can be used to authenticate the partner application, through the app to app call. As long as the token is valid, the User won’t be logged out of the payment apps and all the requests will be authenticated with the token.
iOS
This section describes the steps required to perform a “app to app” call on iOS applications. The technical development itself requires 3 steps:
To receive responses from the SoftPOS, the client application must configure a URL Type in the project’s Info.plist. The name (scheme) must be defined in the URL Schemes field – this is the name by which the SoftPOS app will make the “app to app” call to obtain the answer with the result of the operation performed in the SoftPOS.
In the following example, the “app-to-app” scheme must be replaced by the client application scheme:
Step 2: Create the data model to transfer to mPOS
The call to the SoftPOS by an iOS app is made through a data model (in json format in base64) based on the following parameters:
Below, we provide you with a table with the details of the date model briefly described:
Field
Description
reference
Informs the reference associated to the operation. It is of the String type, 25-character length (maximum). May contain alphanumeric values.
amount
Contains the operation amount and is represented in cents. Example: for a €10 purchase, the value ‘amount’ must be populated with ‘1000’. This field is of the String type.
lockAmountValue
Boolean field. If populated with ‘true’, then it is not possible to edit the amount sent to the SoftPOS and, as such, the SoftPOS starts directly on the payment method selection screen.
performAutomaticClose:
Boolean field. If populated with ‘true’, then the SoftPOS app will open on the Closure screen and automatically start the closure operation without user intervention. If both this field and the field lockAmountValue are populated with ‘true’, then this operation will have priority over the purchase operation, which is ignored.
urlScheme
This field indicates which scheme (of the client application) the SoftPOS app should call to send the result of the executed operation.
The following code sample represents a “app to app” call made to SoftPOS by an iOS app:
The SoftPOS application, upon receiving a “app to app” call processes the requested operation returning the response to the client application with the result (success or error) of the operation. This response is returned to the client application using the following data model defined in JSON in base 64
Here is a brief description with the meaning of the different fields:
Field
Description
CallInError
Value corresponds to the error code (if any) obtained by the SoftPOS while performing the operation. The value is of the String type.
CallInStatus
Informs the status of the operation performed by the SoftPOS, which can be: – DeviceError – Success – Declined – CommError – Usercancelled – UserTimeOut
CallInAmount
Corresponds to the value used in the operation performed in the SoftPOS, and can be used to compare with the value sent in the call to the SoftPOS app. The value is of the String type.
CallInDate
Value informs the date when the operation was performed by the SoftPOS. The value is of the String type.
CallInRef
Corresponds to the reference used in the operation performed in the SoftPOS, and can be used to compare with the value sent in the call to the SoftPOS app. The value is of the String type.
Corresponds to a json with the MB WAY information used in the operation performed in the SoftPOS – TIN and email – that can be sent as a response to a payment with QR code – Name – Shape – Description – fiscalidentificationNumber – String – TIN – email – String – Client’s email
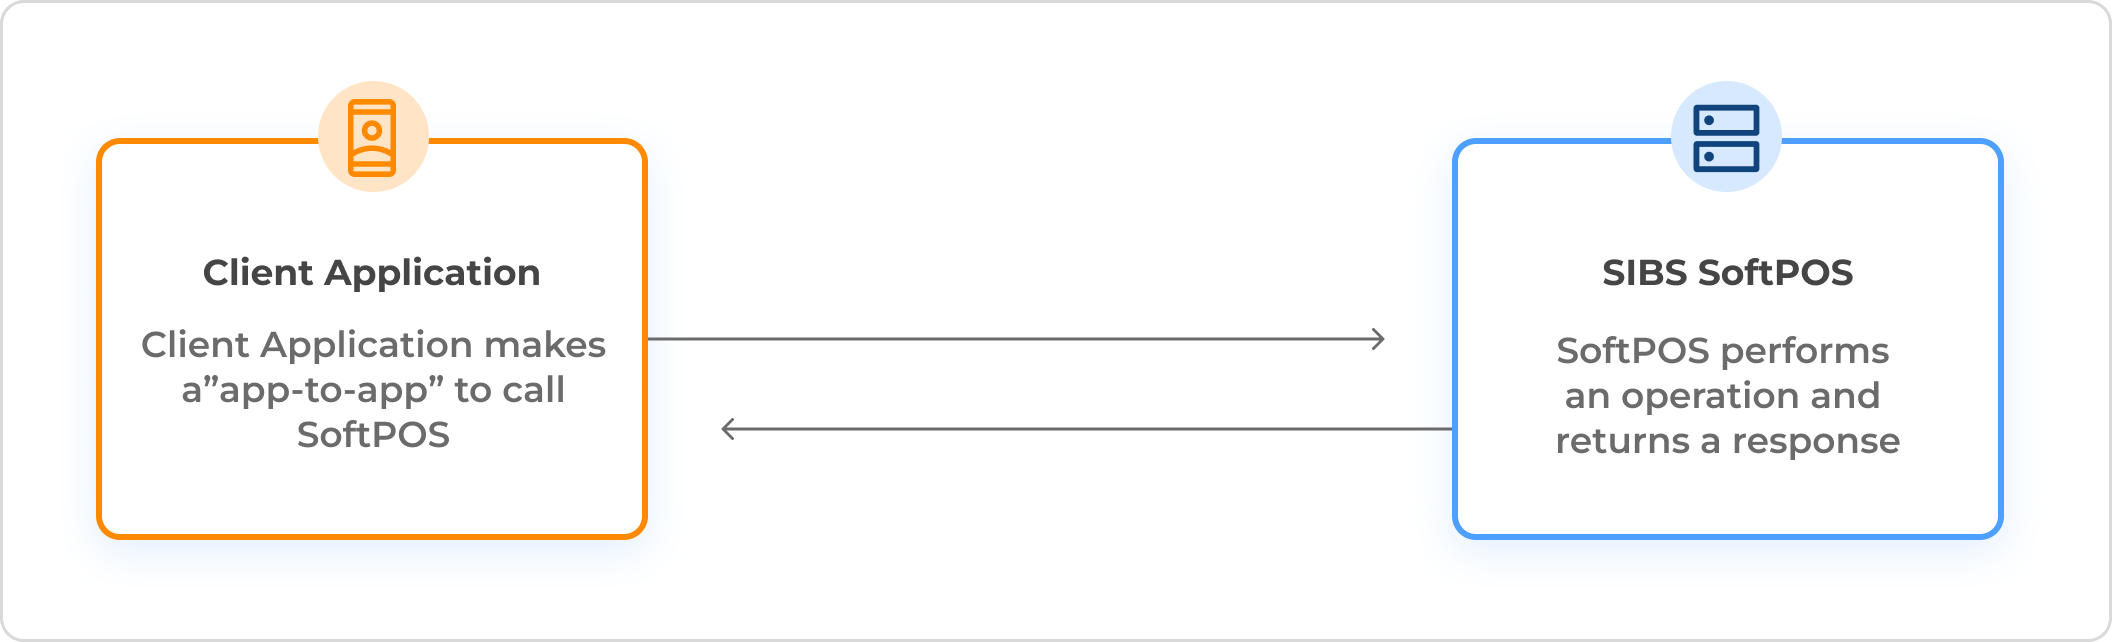
If you are integrating with our SoftPOS+PED/SoftPOS solutions, an App to App integration must be implemented. This integration enables a seamless experience for merchants, eliminating the need to switch between multiple applications on their tablet or smartphone. Through app-to-app integration, triggers in one app can drive actions in another. This means that data from one app is mapped and transferred to the other, optimizing operations and streamlining workflows.
The specific services supported by the SoftPOS + PED/SoftPOS App to App integration are:
Payment request
Used to prompt payment from the customer for a specific amount.
Batch closure request
Used to close an active batch in the SIBS Payment App, which is especially useful for reporting purposes.
Send Reference request
Used to inform the reference associated to the operation.
Single Sign On
Used to allow the user a secure login to the partner application without the need to login into the payment application.
In the diagram below, we provide you a visual scheme of the architecture behind this integration:
The purpose of the following section is to support integrators in providing the necessary elements to configure their Apps to perform SoftPOS “app to app” calls on Android and iOS applications.
In this guide, we present you with various methods for seamless integration with SIBS Smart Terminals based on your specific requirements. This section will help you understand how to structure your requests, manage responses, and handle errors.
Use our App-to-app integrations to facilitate the exchange of data and functionality between your application and the SIBS Payment Application, enabling them to work together seamlessly and share information in real-time.
Unlock the full potential of your application by establishing robust communication with essential terminals peripherals such as printers and card readers. Our comprehensive documentation empowers developers to seamlessly integrate these peripherals, enhancing the functionality and user experience of your application.
Independently of the type of integration, SIBS will provide with testing environment so you can test your integration throughout the process and before going live.
SIBS team will provide you with a testing account, including log in credentials to access the Payment application you are developing the integration with. This is possible through an application that can be directly shared with the integrator via SIBS store.
An integration with the SmartPOS solution itself, requires the access to a physical test terminal.
SIBS team will provide you with a testing equipment (if chosen terminal belongs to SIBS Smart Terminal Catalog), so you can perform tests that reflect real world merchant experience. Otherwise, the manufacturer will provide a testing equipment, if chosen terminal belongs to the Manufacturer catalog.
Once you receive the equipment, developers need to activate their account , so the equipment we are able to a allocate the equipment to a Testing Merchant. The payment application comes installed by default, independently of the type of device.
Additionally, the tests cards (if needed) will be provided by SIBS.
To help you out with issues connected to the payment terminals you can access a dedicated section Troubleshoot.
The TSE (Terminal Support Entity) is entirely responsible for setting up the Production environment (PRD).
Through this section, you will gain visibility over the integration journey with SIBS namely, the different stages that are expected along the process.
Before delving into that, here is a breakdown of the key concepts and stages mentioned:
Integration Journey stands for the end-to-end process that will take place whenever a partner and/or merchant intends to integrate their solution with SIBS mPOS/SoftPOS or SmartPOS product.
Validation is one of the phases contained in the integration journey for SoftPOS + PED / SoftPOS and consists of the process that validates applications by testing listed scenarios and ensuring the integration behaves as expected.
Certification is one of the stages contained in the integration journey for SmartPOS and stands for the evaluation process of third parties’ applications that integrate with SIBS payment application (via app to app or SDK). The Certification itself can be segregated by:
“New Applications”: this is for cases undergoing their first certification, previously certified applications that are more than 6 months old, or applications with major changes.
“Application Upgrade” (Self Certification): this applies to cases where the application was previously certified and is less than 6 months old or has undergone minor changes.
Terminal certification is a separate process for EMV end-to-end certification (EMV Level 3) conducted by SIBS. It is used to validate the compliance of the device and application with card scheme acceptance regulations. Terminal certification is relevant when terminal manufacturers want to join the SIBS network.
This section specifically relates to the integration journey. As regards to the Terminal Certification, you can read more about these specifications on Terminal Certification.
SoftPOS + PED / SoftPOS
The Integration Journey with SIBS SoftPOS + PED / SoftPOS consists of the following stages:
1. Merchant / Partner submits the request
Merchant will submit the request to integrate with SIBS via the integration form. Within this submission, details about the solution to be integrated, must be provided.
2. Business Accreditation
SIBS team evaluates functional validation and business applicability for SoftPOS + PED / SoftPOS.
Applications with the following characteristics are not allowed:
Make disparaging use of institutions, national or religious symbols
Encourage or appeal to violence, and or illegal and criminal activity
Violate dignity of the human person
Contain any discrimination in relation to race, language, territory of origin, sex or religion
Use, without authorization, someone’s image or words
Use pornographic or obscene language, objects or symbols´
Encourage behavior harmful to environmental protection, consumer health and safety
Aim at ideas of trade-union, political or religious content
3. Integration
If business accreditation is successful, the merchant / partner can start the integration process. Throughout this stage, SIBS Onboarding team will provide support to the Developer through JIRA. The development itself is done with the support of the technical documentation contained in section Integrations. Testing environments will be made available for partners.
4. Validation
Once the integration is concluded, the application needs to go through the validation stage. Throughout this stage listed scenarios will be tested to ensure the integration behaves as expected.
5. Conclusion
Once the validation is successfully concluded, the application is made available on Google Play/ App Store and is able to work with SIBS Payment Application.
SmartPOS
SIBS SmartPOS supports different types of applications. Developers are responsible for developing them.
The Integration Journey with SIBS SmartPOS consists of the following stages:
1. Merchant / Partner submits the request
Merchant will submit the request to integrate with SIBS via integration form. Within this submission, details about the solution to be integrated, must be provided. If the solution contains any Payment features and/or if it is integrated with other payment solutions, the merchant must communicate it.
2. Business Accreditation
SIBS team evaluates functional validation and business applicability for SmartPOS.
Applications with the following characteristics are not allowed:
Make disparaging use of institutions, national or religious symbols
Encourage or appeal to violence, and or illegal and criminal activity
Violate dignity of the human person
Contain any discrimination in relation to race, language, territory of origin, sex or religion
Use, without authorization, someone’s image or words
Use pornographic or obscene language, objects or symbols´
Encourage behavior harmful to environmental protection, consumer health and safety
Aim at ideas of trade-union, political or religious content
3. Integration
If business accreditation is successful, the merchant / partner can start the integration process. Throughout this stage, SIBS Onboarding team will provide support to the Developer through JIRA. The development itself is done with the support of the technical documentation contained in section Integrations. Testing environments will be made available for partners.
4. Certification
Once the integration is concluded, the application can only be incorporated in the SmartPOS terminals after successfully passing SIBS’ certification process.
The Developers must submit the application for Certification, indicating the SmartPOS terminal’s brand/model that they require the app to run on. Additionally, this is a process that requires the submission of the following materials:
Code / APK
Functional and technical documentation
The application’s icon in JPEG or PNG format for publication on the SmartPOS.
App’s screenshots
Company’s data: Legal Person Identification Number, Address, Contact
Checklist of Mandatory Tests
5. Security Certification
The partner’s application needs to go through security tests and analysis of the internal operation of the software (communication protocols, code execution/accesses to terminal functions) to identify potential vulnerabilities.
These tests are then described in a security report.
6. Conclusion
Once both certifications are successfully concluded, the application is added to SIBS catalog and distributed via SIBS MDM to the terminals.
Below you can check which applications are currently available within the SmartPOS ecosystem:
Discover how to start accepting in-store payments using SIBS.
This chapter includes information over the different paths and tools that you need to consider to start your integration process with our Smart Terminals solutions.
We will dive into the integration journeys inherent to the different solutions and few details over our test environment.
In this chapter, we will delve into the catalogs of existing Smart terminal devices and explore their distinct specifications to understand where our solutions can be deployed.
SIBS Smart Terminals Catalog
This section refers to a catalog of terminal devices offered by SIBS. These terminals can be acquired directly through SIBS.
PED
SmartPOS
SmartPOS
SmartPOS
SmartPOS
Device
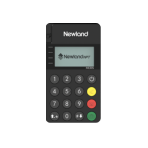
Newnote ME 30S*
Nexgo N5*
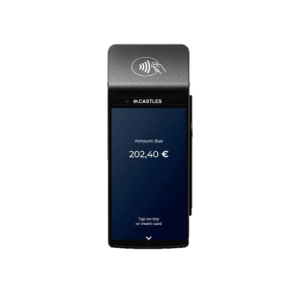
Castles S10000F2 basic*
Castles S1F3
Castles S1U2
Operating system
Android 7.X
Android 9.X
Android 12.X
Android 10.X
Processing
Quad-Core 1.1Ghz
Quad-Core 1.3 Ghz
Quad-Core 2.0GHz
Quad-Core 1.3 Ghz
Memory
1GB RAM +
8HB ROM
2 GB RAM +
16GB ROM
2 GB RAM +
32GB ROM
2GB RAM +
16GB ROM
Card reader
Chip&Pin,
Stripe Reader, Contactless
Chip&Pin,
Stripe Reader, Contactless
Chip&Pin,
Stripe Reader, Contactless
Chip&Pin,
Stripe Reader, Contactless
Chip&Pin,
Stripe Reader, Contactless
Communication
Bluetooth
Bluetooth and
Wi-fi up to 4G
Bluetooth and
Wi-fi up to 4G
Bluetooth and
Wi-fi up to 4G
Bluetooth and
Wi-fi up to 4G
Battery (mAh)
4700 mAh
5200 mAh
6000 mAh
2600mAh
–
Camera
Camera: 5MP & 2MP Barcode scanner: 1D & 2D
Camera: 5MP & 2MP Barcode scanner: 1D & 2D
Camera: 5MP & 2MP
Audio
1x Speaker 1x Microphone
1x Speaker 1x Microphone
1x Speaker 1x Microphone
Manufacturers Smart Terminal Catalog
This section refers to a catalog of terminal devices directly offered by the Manufactures themselves. These terminals are acquired directly through the manufacturer, which is responsible for the setup and maintenance.