The Dashboard Search feature allows users to refine the analytical information displayed within the Dashboard by selecting specific Stores and Terminals.
Advanced Search enables users to focus Dashboard information on a particular operational scope while preserving the currently selected Dashboard filters and analytical categories.
Users can also save frequently used searches, allowing them to be reused quickly in future Dashboard sessions.
Advanced Search
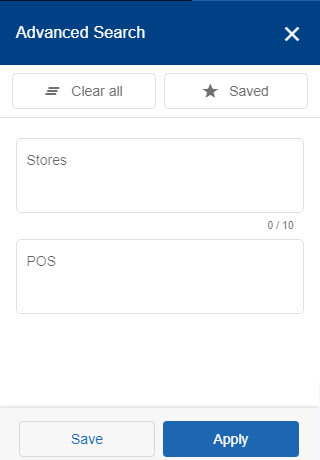
The Dashboard provides an Advanced Search feature that allows users to filter Dashboard information by:
Store
Terminal (POS)
The selected search criteria are applied to the Dashboard and update the displayed analytical information accordingly.
Users may also save frequently used search criteria to simplify future searches.
Figure 1 – “Advanced Search” option
Search Behaviour
The Dashboard supports flexible combinations of Stores and Terminals.
When using Advanced Search:
Users may select no Store, one Store, or up to ten Stores.
For each selected Store, users may select no Terminal, one Terminal, or multiple Terminals.
When a Store is selected, all Terminals associated with that Store become available for selection.
If no Terminal is selected, the Dashboard displays aggregated information for all Terminals associated with the selected Store.
When multiple Stores are selected, the Dashboard makes the associated Terminals of all selected Stores available for selection.
If no Terminal is selected for the selected Stores, the Dashboard displays aggregated information for all associated Terminals.
These search options allow users to analyse Dashboard information at different organisational levels while maintaining the selected analytical filters.
Saved Searches
Frequently used search criteria can be saved for future use.
Saved searches allow users to quickly apply previously configured Store and Terminal selections without recreating the search criteria each time.
Dashboard Filters allow users to refine the information displayed within the Dashboard, enabling transaction data to be analysed according to predefined time periods and analytical criteria.
By applying Dashboard Filters, users can focus on specific time ranges and analytical views, making it easier to monitor transaction activity and evaluate payment performance.
The selected filters affect the information displayed throughout the Dashboard and are applied to all graphical and summary information presented on the page.
Filtering Dashboard Information
The Dashboard provides filtering options that allow users to refine the analytical information displayed without leaving the Dashboard.
Users can refine the displayed information by selecting:
A predefined time period.
An analytical data category.
These filtering options update the Dashboard to display the corresponding transaction information.
Default Time Period
The Dashboard includes predefined time periods that allow users to quickly analyse recent transaction activity.
The available predefined time periods are:
Last 24 Hours
Last 7 Days
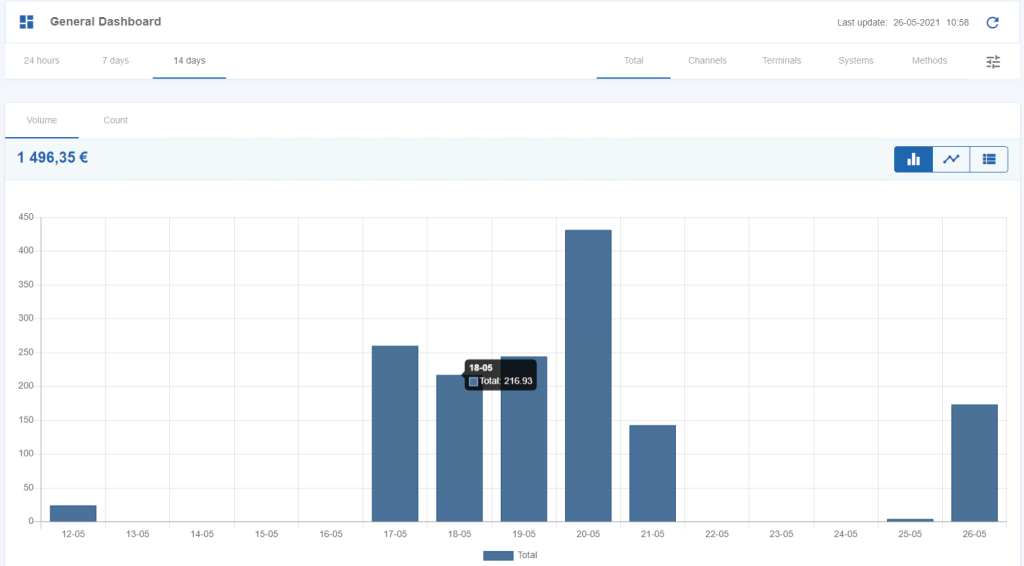
Last 14 Days
To select a predefined time period:
Step 1. Open the Dashboard.
Step 2. Locate the Time Period filter.
Step 3. Select the desired predefined time period.
The Dashboard refreshes automatically to display the corresponding transaction information.
Figure 1 – Filter by a default time period
Data Category Selector
The Data Category selector allows users to change the analytical grouping used to display Dashboard information.
Selecting a different data category updates the Dashboard to present the same transaction information grouped according to the selected analytical perspective.
The Dashboard refreshes automatically to display the selected analytical view.
Figure 2 – Data Category selector
Applying Dashboard Filters
Dashboard filters can be used together to refine the analytical information displayed.
For example, users may combine:
A predefined time period.
A selected data category.
The Dashboard updates automatically whenever a filter selection is changed, allowing users to compare transaction information using different analytical perspectives.
The Dashboard Overview provides a consolidated summary of transaction activity for the selected merchant, presenting analytical information through graphical and tabular representations.
The Dashboard is designed to provide users with an immediate view of transaction performance and payment activity, enabling operational monitoring without requiring navigation through individual transaction lists.
The information displayed within the Dashboard reflects the transaction data available for the selected merchant and analytical criteria.
Dashboard Summary
When users access the Dashboard, the displayed information provides a high-level overview of transaction activity for the selected merchant.
The Dashboard combines summary information with graphical representations, allowing users to quickly identify transaction trends and monitor payment activity.
Depending on the selected analytical criteria, the Dashboard can present transaction information using different groupings and visualization formats to support operational monitoring and business analysis.
The Dashboard information displayed to each user depends on:
The authenticated user’s assigned permissions.
The selected merchant.
The services enabled for the merchant.
The analytical criteria currently applied.
Automatic Data Update
The Dashboard information is refreshed automatically by the SIBS Backoffice platform.
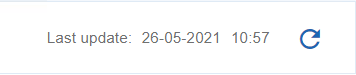
The Last Update indicator displays the date and time when the Dashboard information was most recently refreshed, allowing users to verify the freshness of the displayed analytical information.
The refresh process is performed automatically by the platform and does not require user intervention.
Figure 1 – Automatic data update feature
Understanding the Dashboard
The Dashboard provides an interactive analytical workspace that allows users to review transaction information using different analytical perspectives.
The displayed information can be refined using Dashboard filters, advanced search capabilities, analytical categories, and different visualization modes.
These features enable users to analyse transaction information according to their operational and business requirements.
The following sections of this chapter describe each of these Dashboard capabilities in detail.
Next Steps
After becoming familiar with the Dashboard Overview, users can continue exploring the available analytical capabilities through the following sections:
The Dashboard and Analytics module provides a centralized view of transaction activity and payment performance across the merchant’s configured stores and payment services.
The dashboard presents transaction information using graphical and tabular representations, allowing users to monitor payment activity, analyse transaction trends, and review key operational indicators from a single location.
Depending on the authenticated user’s assigned permissions and the services enabled for the selected merchant, the Dashboard provides access to analytical information that can be filtered and grouped using different criteria to support operational monitoring and business analysis.
Access to the Dashboard is available to users whose Backoffice profile includes permission to use this feature. According to the SIBS Backoffice permission model, Dashboard access is available to the Owner, Administrator, Manager, and Supervisor user profiles.
Dashboard Purpose
The Dashboard is designed to provide a consolidated view of transaction data, enabling users to:
Monitor transaction activity.
Analyse transaction volume and payment trends.
Compare transaction data using different grouping criteria.
Review payment information using graphical and tabular representations.
The information displayed within the Dashboard is continuously updated and can be filtered according to different analytical criteria, allowing users to focus on the information most relevant to their operational needs.
Dashboard Capabilities
The Dashboard provides analytical capabilities that allow users to:
View transaction summaries.
Filter information using predefined time periods.
Group transaction data using different analytical categories.
Display information using multiple graphical representations.
Analyse transaction volume and transaction count.
The available analytical information and operational capabilities may vary depending on the authenticated user’s permissions and the merchant services enabled within the Backoffice platform.
Dashboard Components
The Dashboard combines several analytical components that work together to provide a consolidated view of transaction activity.
These components include:
Dashboard Overview, providing a summary of transaction activity and an overview of the information available within the Dashboard.
Dashboard Filters, allowing users to refine the displayed information using predefined time periods and other filtering options.
Dashboard Search, enabling users to locate Dashboard information for specific Stores or Terminals.
Dashboard Data Categories, allowing transaction data to be grouped and analysed using different business perspectives.
Dashboard Visualizations, presenting analytical information using graphical and tabular representations.
Each of these components is described in the following sections of this chapter.
Dashboard Availability
Dashboard access is controlled by the permissions assigned to the authenticated user’s Backoffice profile.
Depending on the authenticated user’s assigned profile, different operational functions and analytical information may be available within the Dashboard.
The Dashboard contents may also vary according to:
The authenticated user profile.
The permissions assigned to that profile.
The selected merchant.
The services enabled for the merchant.
As a result, different users may have access to different analytical information while using the same Backoffice platform.
The User Assistance features provide quick access to resources that help users operate the SIBS Backoffice platform, obtain support, stay informed about important events, and personalize the user interface.
Accessible from the dashboard header, these features include:
Support resources and documentation.
Frequently Asked Questions (FAQs).
Support request submission.
System notifications.
Language selection.
These features are available throughout the authenticated Backoffice session, regardless of the operational area currently being used.
Support
The Support menu provides access to documentation and assistance resources available to Backoffice users.
These resources allow users to obtain additional information about the platform, consult frequently asked questions, access the online documentation, and submit support requests when assistance is required.
Accessing the Support Menu
To access the Support menu:
Step 1. Sign in to SIBS Backoffice.
Step 2. From the User Dashboard, select the Support icon located in the dashboard header.
Step 3. Review the available support resources.
Figure 1 – Support menu
Available Support Resources
Depending on the services available within the Backoffice platform, the Support menu may provide access to:
Frequently Asked Questions (FAQs)
User Guide
Support Requests
Frequently Asked Questions (FAQs)
The Frequently Asked Questions (FAQs) section provides answers to common questions regarding the use of the SIBS Backoffice platform.
Users should consult the FAQs before submitting a support request, as many operational questions and common scenarios are already documented.
To access the FAQs:
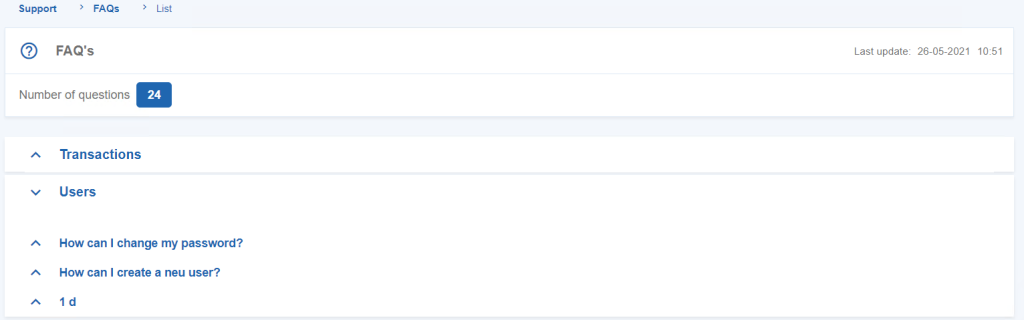
Step 1. Open the Support menu.
Step 2. Select FAQs.
Figure 2 – Frequently Asked Questions
User Guide
The User Guide provides direct access to the online SIBS Payment Gateway documentation.
The online documentation contains comprehensive guidance covering Backoffice operations, payment methods, transaction management, merchant configuration, integration models, notifications, technical examples, and other platform capabilities.
To access the User Guide:
Step 1. Open the Support menu.
Step 2. Select User Guide.
The online documentation opens in a new browser tab, allowing users to navigate directly to the relevant documentation topics.
Support Requests
Support Requests allow users to submit questions or report issues directly from the Backoffice platform.
When creating a support request, users should provide sufficient information to allow the reported issue to be investigated efficiently.
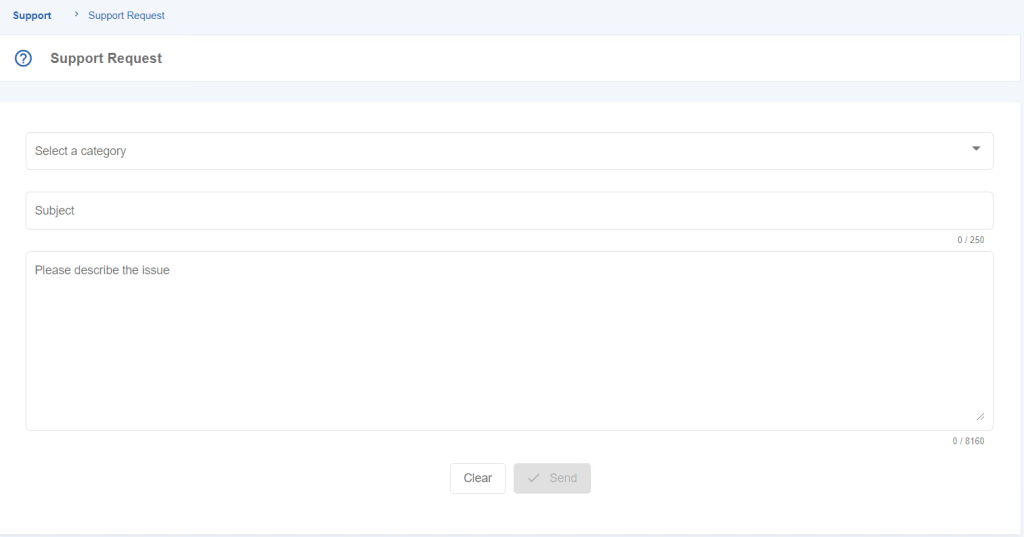
To submit a Support Request:
Step 1. Open the Support menu.
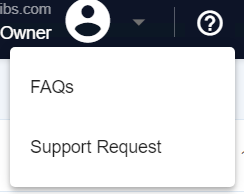
Step 2. Select Support Request.
Step 3. Complete the required information describing the question or issue.
Step 4. Submit the request.
Figure 3 – Support Request
Notifications
The Notifications feature provides visibility into important platform messages and operational events.
Notifications help users stay informed about information requiring attention while using the Backoffice platform.
Viewing Notifications
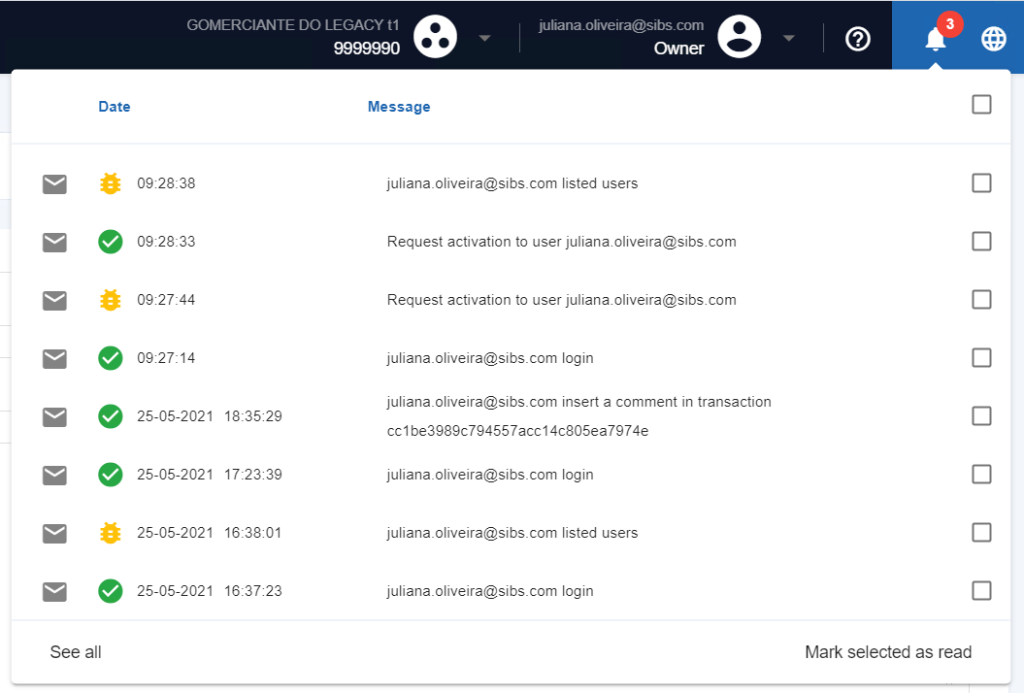
To view notifications:
Step 1. From the User Dashboard, select the Notifications icon located in the dashboard header.
Step 2. Review the available notifications.
Figure 4 – Notifications panel
Notifications are displayed directly within the notification panel and may include operational or informational messages generated by the platform.
Language Selection
The Language Selection feature allows users to change the language used by the Backoffice user interface.
Changing the language affects the display language of menus, labels, and other interface elements.
Changing the Interface Language
To change the Backoffice language:
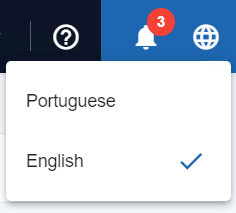
Step 1. From the User Dashboard, select the Language selector located in the dashboard header.
Step 2. Select the preferred language.
Figure 5 – Language selection
The Backoffice user interface is updated to display the selected language.
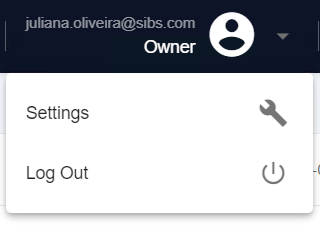
The Profile Menu provides access to the authenticated user’s account information and personal account management functions within the SIBS Backoffice platform.
Accessible from the dashboard header, the Profile Menu allows users to review their account information, manage personal settings, switch between associated merchants, and securely terminate the current session.
The information displayed within the Profile Menu typically includes the authenticated user’s registered e-mail address, assigned user profile, and the currently selected merchant.
The availability of individual functions depends on the authenticated user’s assigned profile, permissions, and the services enabled for the selected merchant.
Accessing the Profile Menu
To access the Profile Menu:
Step 1. Sign in to SIBS Backoffice.
Step 2. From the User Dashboard, select the Profile icon located in the header bar.
Step 3. Review the available account information and management options.
Figure 1 – Profile button on the User’s Dashboard
Available Functions
Depending on the authenticated user’s permissions and merchant configuration, the Profile Menu may provide access to the following functions:
Merchant Selection – Switch between merchants associated with the authenticated user.
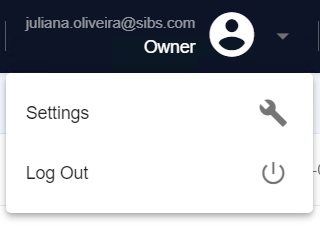
Settings – Manage personal account settings.
Log Out – End the current authenticated session.
Some functions available within Settings may only be accessible to users with specific profiles or administrative permissions.
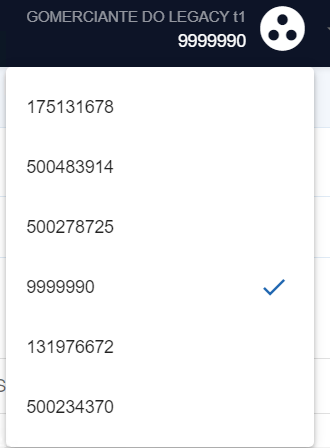
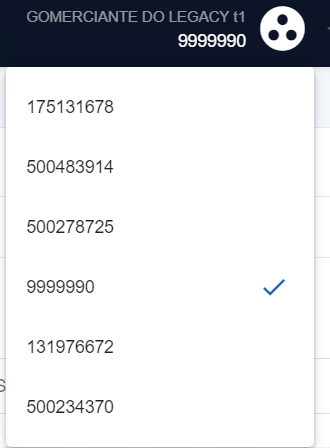
Merchant Selection
Users may be associated with one or more merchants within the SIBS Backoffice platform.
When multiple merchants are available, the Profile Menu allows the active merchant to be changed without requiring a new authentication session.
To select a different merchant:
Step 1. Open the Profile Menu.
Step 2. Review the list of available merchants.
Step 3. Select the merchant to be used during the current session.
Figure 2 – Select Merchant by NIF
Changing the active merchant updates the available menus, operational functions, reporting information, configuration areas, and services according to the selected merchant and the permissions assigned to the authenticated user.
The User Dashboard is the main workspace of the SIBS Backoffice platform.
After successful authentication, users are redirected to the dashboard, which provides access to the operational areas, configuration menus, reporting capabilities, and services available according to the assigned user profile and the merchant services enabled for the account.
The dashboard serves as the primary starting point for daily Backoffice operations, providing centralized access to the platform’s operational and administrative capabilities.
Dashboard Layout
The User Dashboard is organized into several functional areas that provide quick access to the platform’s capabilities.
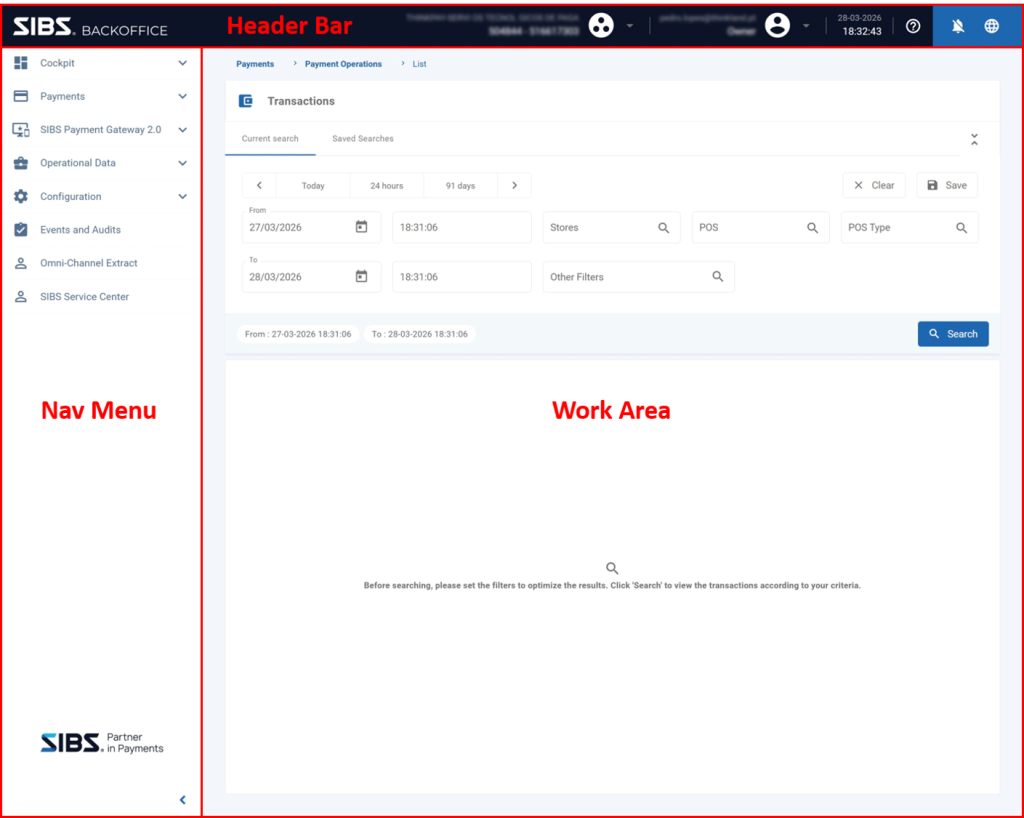
Figure 1 – SIBS Backoffice Dashboard
The dashboard typically consists of:
Navigation Menu – Provides access to the main operational areas of the platform, such as transactions, reporting, configuration, and other Backoffice services.
Work Area – Displays the currently selected page or operational workspace.
Header Bar – Provides access to user-related functions, notifications, support resources, language selection, and other global platform options.
The menus and functionalities available within the dashboard depend on the permissions assigned to the authenticated user and the services enabled for the selected merchant.
Dashboard Navigation
The navigation menu provides access to the operational modules available within the Backoffice platform.
Depending on the assigned permissions and enabled merchant services, users may have access to operational areas such as:
Transaction Management
Dashboard and Analytics
Merchant Configuration
User Administration
Terminal Management
Payment Gateway Services
Additional operational and reporting features
Selecting an option from the navigation menu updates the work area with the corresponding functionality.
Header Functions
The dashboard header provides access to user-specific and platform-wide functions that remain available regardless of the currently selected operational area.
The header includes:
Profile Menu, used to access account settings, merchant selection, and session management.
Support, providing access to frequently asked questions, documentation, and support requests.
Notifications, displaying important operational and system messages.
Language Selection, allowing the user interface language to be changed.
Each of these functions is described in the following sections of this chapter.
Dashboard Personalization
The information and operational areas available within the dashboard may vary depending on:
The authenticated user profile.
The permissions assigned to that profile.
The selected merchant.
The services enabled for the merchant.
As a result, different users may see different menus, dashboards, operational functions, and configuration areas while using the same Backoffice platform.
Access to SIBS Backoffice is controlled through role-based user profiles.
Each user account is associated with one or more merchants and is granted permissions according to the assigned profile. These permissions determine which menus, operational actions, configuration areas, and reporting functionalities are available within the platform.
The availability of specific features also depends on the services enabled for the merchant.
User Profiles
SIBS Backoffice supports the following user profiles:
Owner
Administrator
Manager
Supervisor
Operator
Analytics
QR Code Manager
Each profile provides a predefined set of permissions that determine the menus, operational actions, configuration areas, reporting capabilities, and administrative functions available within the platform.
Depending on the assigned profile, access may be granted at different organizational levels, including merchant groups, stores, and terminals.
The scope associated with each profile determines which operational data, transactions, reporting information, and configuration areas are visible within the Backoffice.
Depending on the merchant configuration and enabled services, users may have access to transaction management, reporting, user administration, terminal management, payment gateway services, and other Backoffice features.
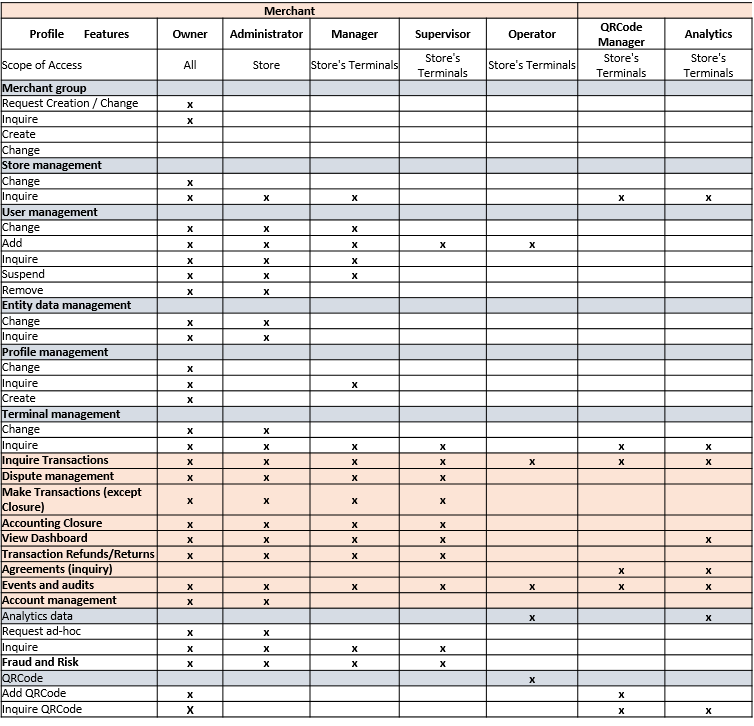
Profile Permissions and Access Scope Matrix
Figure 1 – SIBS Backoffice Profiles and access
The following matrix summarizes the permissions associated with each Backoffice profile.
Permissions may vary depending on the services enabled for the merchant and the operational configuration of the Backoffice environment.
The matrix should be used as a general reference for profile capabilities and access scopes.
Authentication
Authentication allows registered users to securely access the SIBS Backoffice platform according to the permissions assigned to their user profile.
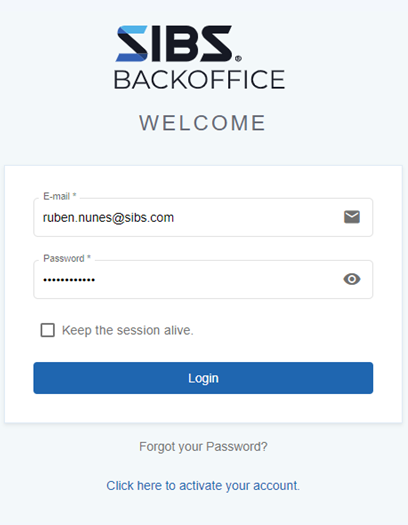
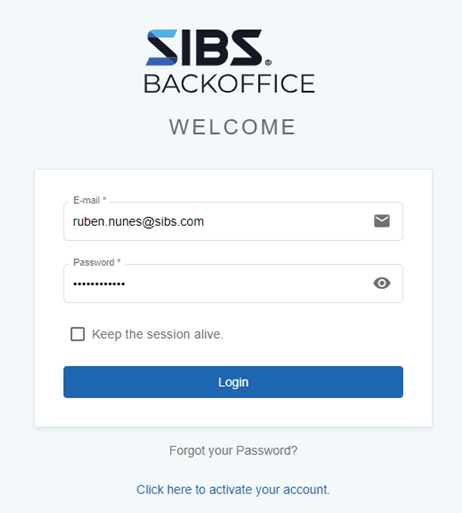
Users access SIBS Backoffice through the platform login page using their registered e-mail address and password.
Before signing in, ensure you have:
An active SIBS Backoffice user account.
A registered e-mail address.
A valid password.
Figure 2 – SIBS Backoffice Login page
To start a session:
Step 1. Open the SIBS Backoffice login page.
Step 2. Enter the registered e-mail address.
Step 3. Enter the password.
Step 4. Optionally select “Keep the session alive” to remain authenticated on the current device until signing out.
Step 5. Click “Login”.
After successful authentication, users are redirected to the Backoffice dashboard, where the available menus and functionalities are determined by the assigned user profile and the merchant services enabled for the account.
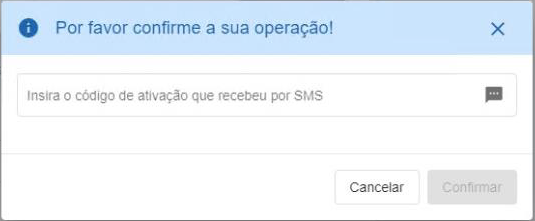
Depending on the account configuration and applicable security requirements, additional validation steps may be required during the authentication process.
First Login
When a new user account is created, a temporary password is generated for the user.
During the first authentication, this temporary password must be replaced with a personal password before access to the Backoffice is granted.
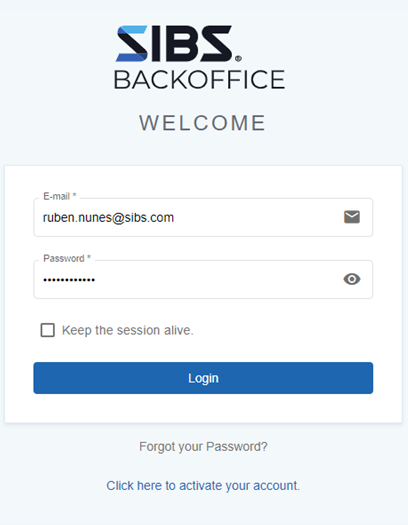
Figure 3 – First login to SIBS Backoffice
To complete the first login:
Step 1. Open the SIBS Backoffice login page.
Step 2. Enter the registered e-mail address.
Step 3. Enter the temporary password.
Step 4. Click “Login”.
Step 5. When prompted, define a new password.
Step 6. Confirm the new password.
Step 7. Complete the password change process.
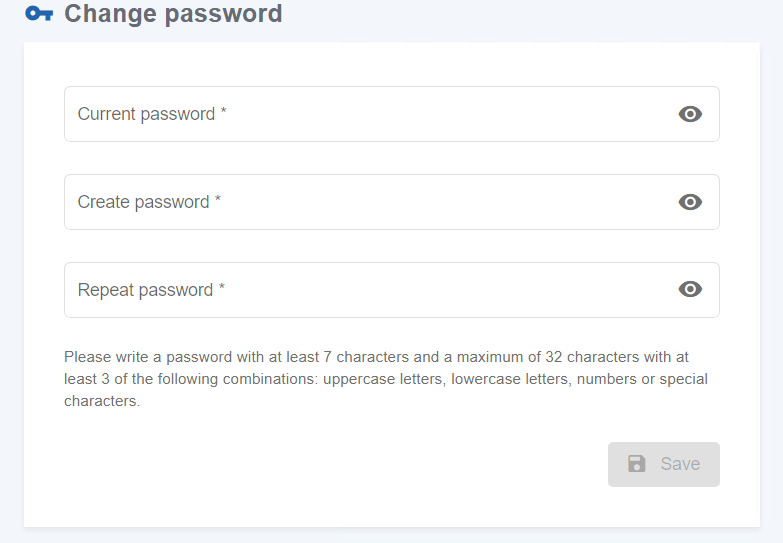
The new password must:
Contain at least seven characters.
Include at least three of the following character groups:
Uppercase letters
Lowercase letters
Numbers
Special characters.
After the password has been successfully changed, the temporary password is no longer valid and subsequent authentications must use the newly defined password.
Merchant Activation
Merchant Activation is the process that enables users associated with a newly created merchant account to access the SIBS Backoffice platform for the first time.
Before users can authenticate for the first time, the merchant account must be activated using the activation information provided during the onboarding process.
Before starting the activation process, ensure you have:
The registered e-mail address.
The activation code received by e-mail (valid for a limited period).
The definition of a new password.
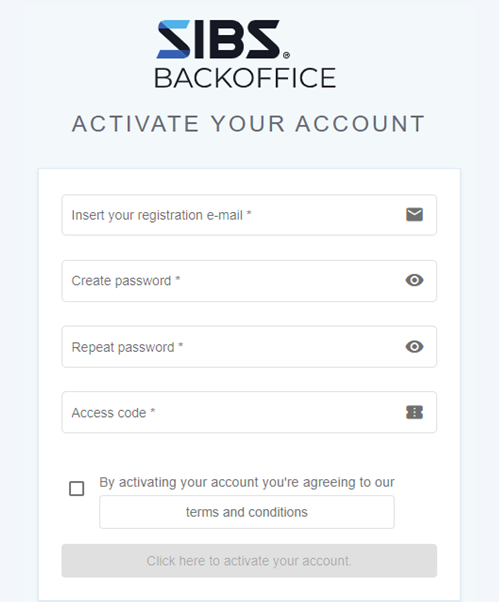
Figure 5 – Credentials to activate the account
To activate a merchant account:
Step 1. Open the SIBS Backoffice login page
Step 2. Select “Click here to activate your account”
Step 3. Enter the registered e-mail address
Step 4. Define a new password
Step 5. Confirm the password
Step 6. Enter the activation code received by e-mail
Step 7. Review the applicable Terms and Conditions
Step 8. Accept the Terms and Conditions
Step 9. Complete the activation process
After successful activation, the merchant account becomes available for user authentication through the standard Backoffice login page.
Password Recovery
Password Recovery allows users to regain access to their SIBS Backoffice account when the current password is no longer available.
To protect the account against unauthorized access, the recovery process verifies the identity of the user before allowing a new password to be defined.
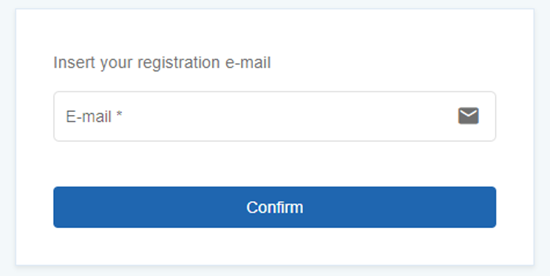
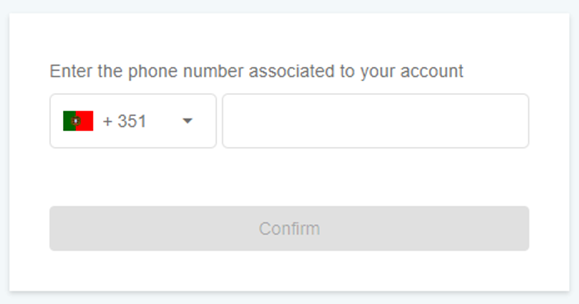
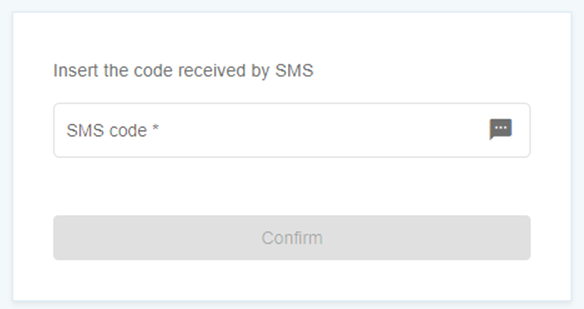
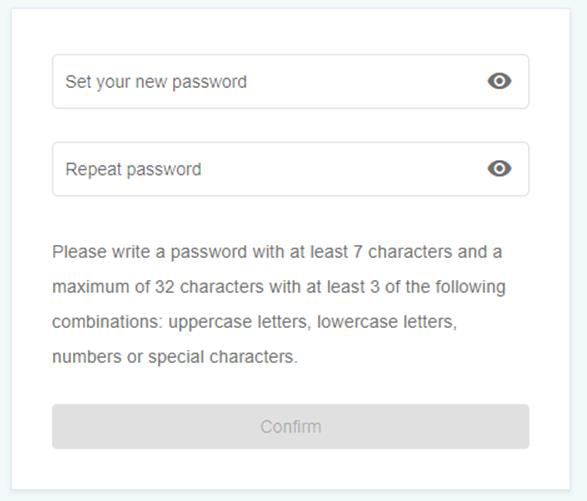
The following steps illustrate the complete recovery process.
Step 1. On the login page, select “Forgot your Password?”
Step 2. Enter the registered e-mail address
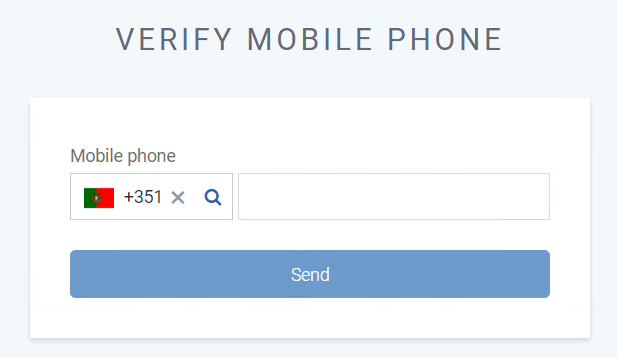
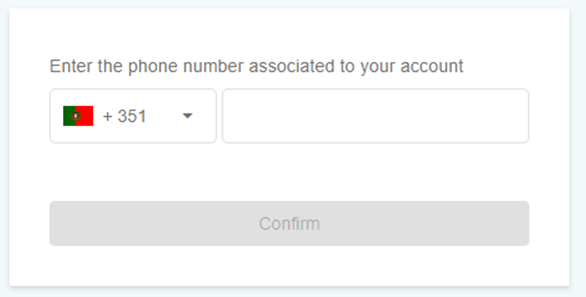
Step 3. Confirm the mobile phone number associated with the account
Step 4. Enter the verification code received by SMS
Step 5. Define a new password
Once the process is completed, the user can authenticate using the newly defined password.
Merchant Selection
Users may be associated with one or more merchants within the SIBS Backoffice platform.
When a user has access to multiple merchants, the active merchant context determines which transactions, configuration areas, reporting information, and operational functions are available during the current session.
Figure 6 – Merchant Selection
To select a merchant:
Step 1. Open the Profile menu.
Step 2. Review the list of available merchants.
Step 3. Select the merchant to be used during the current Backoffice session.
The selected merchant remains active for the current session until another merchant is selected or the user signs out.
The available functionalities, data visibility, and operational capabilities are determined by both the selected merchant and the permissions assigned to the user profile.
Security Considerations
Access to SIBS Backoffice is protected through authenticated user accounts and role-based permissions.
Administrative actions, configuration changes, and operational functions are restricted according to the permissions assigned to each profile.
Users should ensure that account credentials remain confidential and that access is granted only to authorized personnel.
The SIBS Backoffice is a web-based platform that provides merchants with centralized access to operational, administrative, and transaction management functionalities related to SIBS payment services.
The platform supports monitoring payment activity across multiple channels and services, providing operational visibility and enabling authorized users to perform management and support actions according to their assigned permissions.
Designed to support omni-channel and multi-acquirer payment operations, SIBS Backoffice provides a unified interface for transaction consultation, operational management, reporting, and service configuration.
Access to specific functionalities depends on the merchant services enabled in the platform and the permissions assigned to each user profile.
Access and User Profiles
Access to SIBS Backoffice is controlled through role-based user profiles. Depending on the assigned profile, users have access to specific menus, operational actions, configuration areas, and reporting capabilities.
Several user profiles are available, each providing access to specific menus, operational actions, configuration areas, and reporting capabilities. Detailed information about the available profiles is provided in G.1.1 – Access and User Management.
Navigation and Platform Structure
SIBS Backoffice is organized into functional areas that support operational management, transaction monitoring, merchant configuration, reporting, and payment-related services.
Depending on the enabled services and assigned permissions, users may access features related to transaction management, dashboards, user administration, terminal management, reporting, recurring payments, QR Codes, and other payment gateway services. The availability of menus and operational areas depends on the services contracted by the merchant and the permissions assigned to each user profile.
These areas group the available functionalities and allow users to navigate between transaction management, operational actions, and other features available within the platform.
Transaction Management
The Backoffice allows users to consult and manage transactions.
Transaction management features allow users to search, filter, and consult payment transactions, access detailed transaction information, review associated transactions, and perform operational actions when permitted.
Operational Actions
The Backoffice enables the execution of operational actions associated with transactions, depending on the permissions defined for the user.
Depending on the transaction type and user permissions, operational actions may include:
Payment capture (confirmation of an authorization)
Authorization cancellation
Refund processing
Receipt generation
Transaction comments
These operations are available in the context of the corresponding transactions.
Reporting
The platform provides reporting and analytics capabilities that support operational monitoring and transaction analysis.
Depending on permissions, users can access dashboards, transaction summaries, exported data, and downloadable reports.
These functionalities support the analysis and consultation of operational data available within the platform.
Payment Gateway Features
Merchants using SIBS Payment Gateway services may have access to additional Backoffice functionalities such as recurring payment management, static QR Codes (when enabled for the merchant), credentials management, token management, payment entities, and vTerminal operations.
Detailed operational procedures, screenshots, and configuration instructions are provided in the corresponding Backoffice and VTerminal sections of this documentation.
Summary
The SIBS Backoffice provides a web-based interface that allows users to consult transactions, perform operational actions, and access functionalities related to payment management.
Access to these functionalities is controlled through user profiles, ensuring that each user can only perform the operations permitted within their role.
This chapter consolidates the key cross-cutting principles and consistency rules that apply across all sections of Chapter F. Technical Examples and Best Practices and the broader SPG documentation.
Its purpose is to ensure that integrators interpret examples, flows, and behaviors consistently across different integration models, payment methods, and operational scenarios, avoiding misinterpretation caused by isolated reading of individual sections of the documentation.
Event vs Transaction-State Confirmation
Across all examples and flows in this documentation, a strict distinction must be maintained between:
Confirmed transaction-state outcome, obtained from a validated final webhook payload or from Status Inquiry / Get Status when confirmation, reconciliation, recovery, or inconsistency resolution is required
Webhook notifications represent asynchronous state transitions or processing events. In some scenarios, they may carry a final paymentStatus; however, transaction-state confirmation and reconciliation must follow the applicable validation rules.
When confirmation, reconciliation, recovery, or inconsistency resolution is required, the transaction state should be confirmed using Status Inquiry / Get Status:
Status Inquiry / Get Status must be treated as the reconciliation and confirmation mechanism when the merchant needs to verify, recover, or resolve the transaction state.
All examples assume:
validated webhook data may represent a transaction-state event, including final-state notifications in applicable scenarios
Status Inquiry / Get Status is used when additional confirmation or reconciliation is required
final internal decisions must rely on a validated transaction-state source: either a validated final webhook notification or Status Inquiry / Get Status when required
discrepancies must be resolved through Status Inquiry / Get Status validation when reconciliation is required
When extended operational diagnostics are required during reconciliation analysis, troubleshooting, or lifecycle investigation, additional visibility may leverage Inquiry Details as described in E.2.10 – Inquiry Details API.
Consistency Across Integration Models
The principles described in this chapter apply equally to:
Form Integration
Server-to-Server Integration
Plugin-based integrations
While implementation details differ, the following remain constant:
transaction lifecycle model
asynchronous behavior
webhook processing requirements
status reconciliation model
This ensures that all integration approaches remain functionally consistent.
Operational Responsibility Boundaries
Across all chapters, responsibilities are clearly separated:
SPG responsibilities:
transaction processing
webhook delivery
retry mechanisms
Merchant responsibilities:
webhook endpoint availability
acknowledgement handling
idempotent processing
internal retry logic
transaction state validation
Understanding these boundaries is critical for correct system design and troubleshooting.
Final Consideration
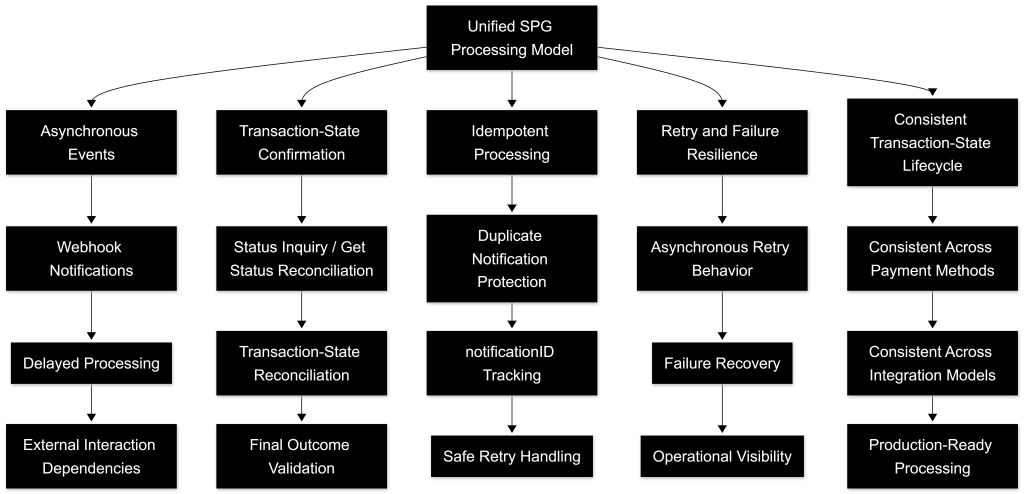
All examples, flows, and patterns in Chapter F are designed to be interpreted within a unified processing model, where:
events are asynchronous
transaction-state outcomes must be validated before they are persisted or reconciled internally
processing must be idempotent and resilient
By applying these consistency rules across all chapters, integrators ensure that their implementation remains:
correct across all payment methods
resilient under failure conditions
aligned with SPG operational behavior
This guarantees a coherent, reliable, and production-ready integration, independent of specific use cases or implementation details.