

Overview
The Profile Menu provides access to the authenticated user’s account information and personal account management functions within the SIBS Backoffice platform.
Accessible from the dashboard header, the Profile Menu allows users to review their account information, manage personal settings, switch between associated merchants, and securely terminate the current session.
The information displayed within the Profile Menu typically includes the authenticated user’s registered e-mail address, assigned user profile, and the currently selected merchant.
The availability of individual functions depends on the authenticated user’s assigned profile, permissions, and the services enabled for the selected merchant.
Accessing the Profile Menu
To access the Profile Menu:
Step 1. Sign in to SIBS Backoffice.
Step 2. From the User Dashboard, select the Profile icon located in the header bar.
Step 3. Review the available account information and management options.

Figure 1 – Profile button on the User’s Dashboard
Available Functions
Depending on the authenticated user’s permissions and merchant configuration, the Profile Menu may provide access to the following functions:
- Merchant Selection – Switch between merchants associated with the authenticated user.
- Settings – Manage personal account settings.
- Log Out – End the current authenticated session.
Some functions available within Settings may only be accessible to users with specific profiles or administrative permissions.
Merchant Selection
Users may be associated with one or more merchants within the SIBS Backoffice platform.
When multiple merchants are available, the Profile Menu allows the active merchant to be changed without requiring a new authentication session.
To select a different merchant:
Step 1. Open the Profile Menu.
Step 2. Review the list of available merchants.
Step 3. Select the merchant to be used during the current session.
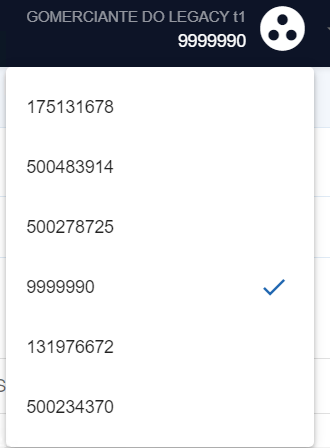
Figure 2 – Select Merchant by NIF
Changing the active merchant updates the available menus, operational functions, reporting information, configuration areas, and services according to the selected merchant and the permissions assigned to the authenticated user.
For additional information about merchant associations and access permissions, see G.1.1 – Access and User Management.
Settings
The Settings option provides access to personal account management functions.
Depending on the authenticated user’s permissions, the following operations may be available:
- Change Password
- Change Mobile Number
- Deactivate Merchant Account (Owner profile only)
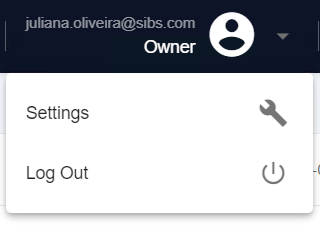
Figure 3 – Change settings of the User logged on
Change Password
Users may change their Backoffice password at any time through the Settings page.
To change the account password:
Step 1. Open the Profile Menu.
Step 2. Select Settings.
Step 3. Select Change Password.
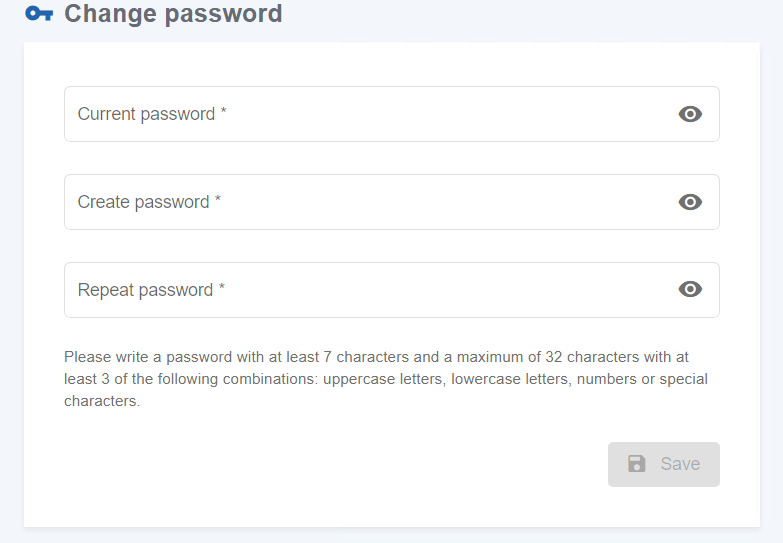
Step 4. Enter the current password.
Step 5. Enter and confirm the new password.
Step 6. Save the changes.
Once the password has been successfully updated, all subsequent authentications must use the newly defined password.
Change Mobile Number
The mobile phone number associated with the authenticated user account can be updated through the Settings page.
To change the registered mobile phone number:
Step 1. Open the Profile Menu.
Step 2. Select Settings.
Step 3. Select Change Mobile Number.
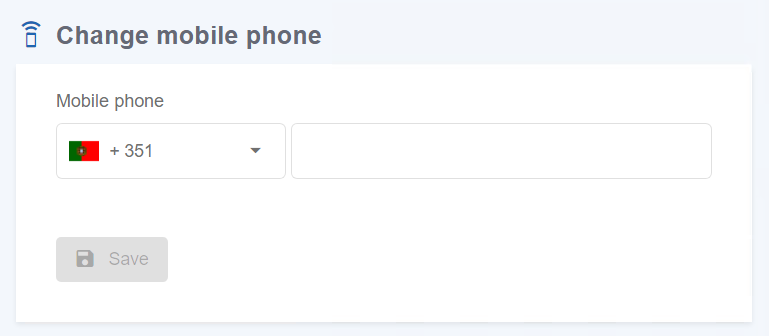
Step 4. Enter the activation code received for the current mobile phone number.
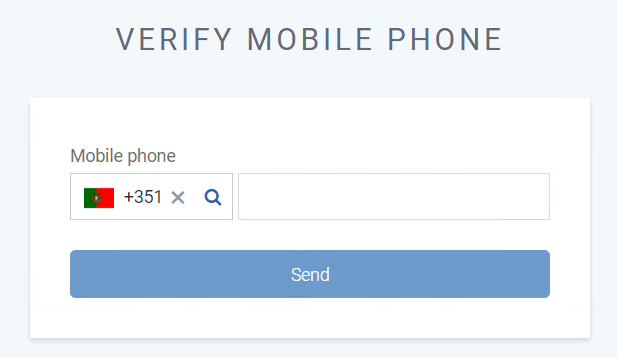
Step 5. Enter the new mobile phone number.
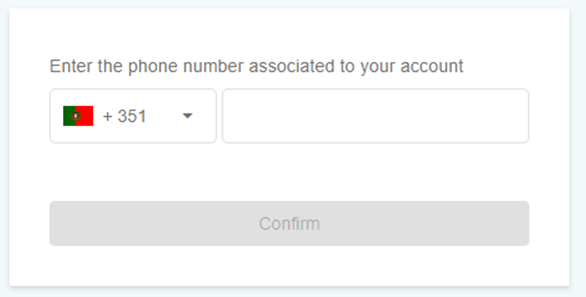
Step 6. Enter the activation code received for the new mobile phone number.
Step 7. Confirm the update.
After the verification process has been successfully completed, the new mobile phone number becomes associated with the authenticated user account.
Deactivate Merchant Account
Merchant account deactivation is available only to users with the Owner profile.
This operation deactivates the currently selected merchant account and requires user confirmation before being completed.
To deactivate a merchant account:
Step 1. Open the Profile Menu.
Step 2. Select Settings.
Step 3. Select Deactivate Merchant Account.
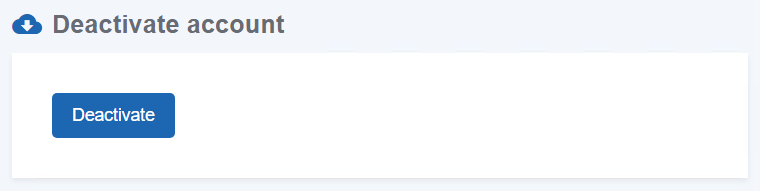
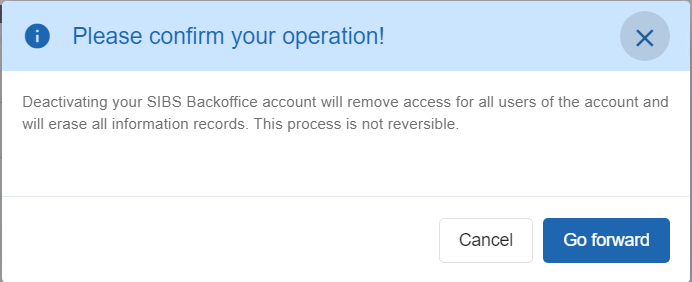
Step 4. Review the confirmation message.
Step 5. Enter the verification code when requested.
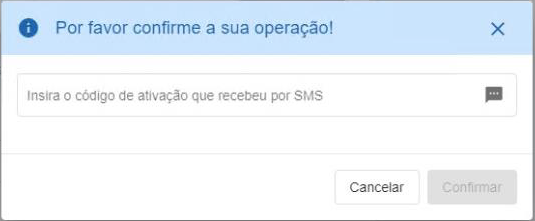
Step 6. Confirm the operation.
Log Out
The Log Out option securely terminates the current authenticated Backoffice session.
Users should always sign out after completing their work, particularly when using shared or public devices.
To end the current session:
Step 1. Open the Profile Menu.
Step 2. Select Log Out.
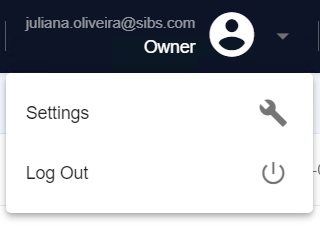
After signing out, the current session is terminated and the user is returned to the Backoffice login page.