

Overview
The User Administration area allows authorized users to manage SIBS Backoffice user accounts associated with the merchant.
Depending on the authenticated user’s permissions, this area provides functionality to view registered users, create new user accounts, assign profiles, configure merchant and store access, associate POS terminals, and update existing user information.
Access to User Administration is restricted to users with the appropriate administrative permissions.
Accessing User Administration
User Administration is available from the Configuration section of the SIBS Backoffice navigation menu.
Selecting Users displays the list of users associated with the current merchant.

Figure 1 – User Status
Viewing Users
The Users page displays all user accounts registered for the selected merchant.
The list includes summary information for each user, such as:
- Status
- User
- Profile
- Mobile Phone
User status is represented by coloured indicators that identify the current status of each account, allowing administrators to quickly identify the operational state of registered users.
Depending on the authenticated user’s permissions, only users belonging to the selected merchant are displayed.
Creating a New User
Authorized users can create new SIBS Backoffice user accounts.
To create a new user:
Step 1. Select Add User.
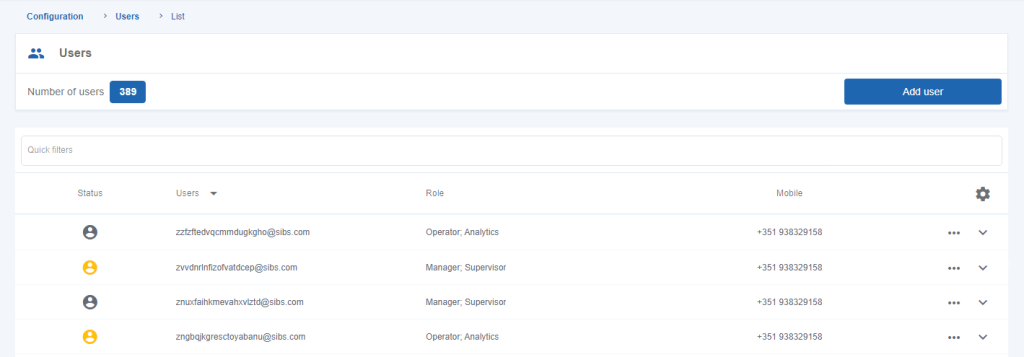
Figure 2 – Add a New User
The New User form is displayed.
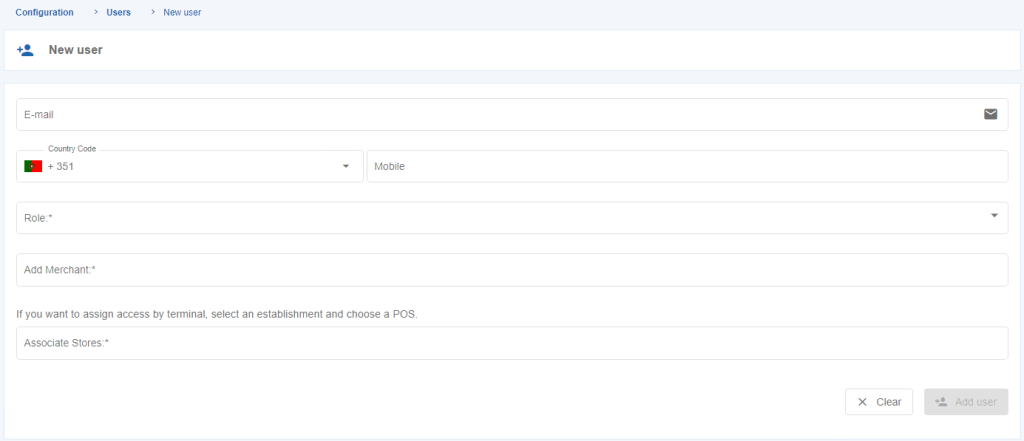
Figure 3 – Form to add a New User
Complete all mandatory fields, including:
- Name
- E-mail address
- Mobile phone
- Assigned profile
- Stores
- Associated POS terminals (optional, when applicable)
The assigned profile determines the permissions available to the new user.
Stores can be assigned directly, and individual POS terminals may also be associated by selecting a store and then choosing the required terminals.

Step 2. Review the user information.
Step 3. Submit the new user.
After the account is created, the new user receives an SMS containing a temporary activation code.
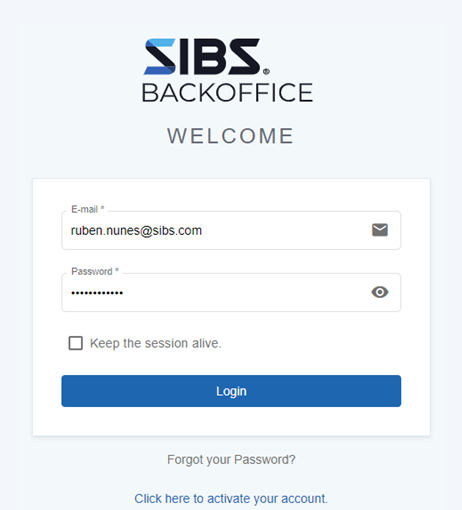
Figure 4 – Login of the new SIBS Backoffice User
During the first login, the user must confirm the activation code and define a new password before accessing the Backoffice.
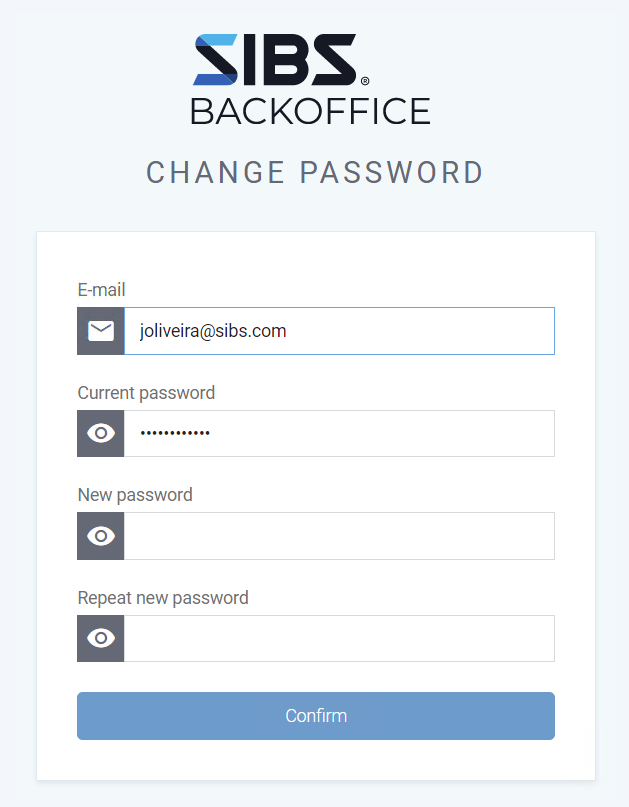
Figure 5 – Change the password after the first login
For detailed information about first-time user activation and password initialization, refer to G.1.1 – Access and User Management.
Creating a User with Merchant Group Access
A single Backoffice user can be associated with multiple merchants belonging to the same merchant group.
To create a user with merchant group access:
Step 1. Select Add User.
Step 2. Complete the user information.
Step 3. In the Add Merchant section, select all merchants that should be associated with the user.
Step 4. Submit the new user.
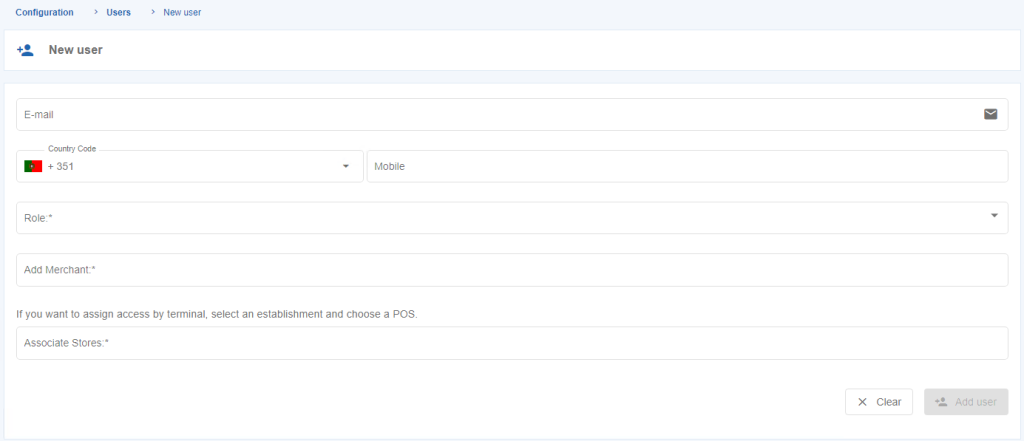
Figure 6 – Add User with Merchant Group View
If an existing user is associated with additional merchants, SIBS Backoffice sends an e-mail notification informing the user of the updated merchant associations.
Searching for Users
The Users page provides Quick Filters that allow users to efficiently locate registered user accounts.
Users can search using information contained in the user record.
Up to three filter parameters can be applied simultaneously.
To clear a filter, select the X icon associated with the filter parameter.
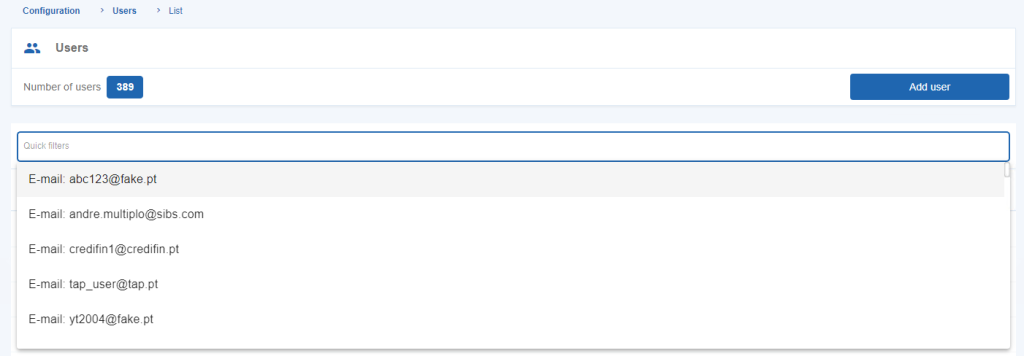
Figure 7 – User Quick Filters
Editing User Information
Authorized users can update the information associated with existing Backoffice users.
To edit a user:
Step 1. Locate the required user.
Step 2. Open the Options menu.
Step 3. Select Edit.
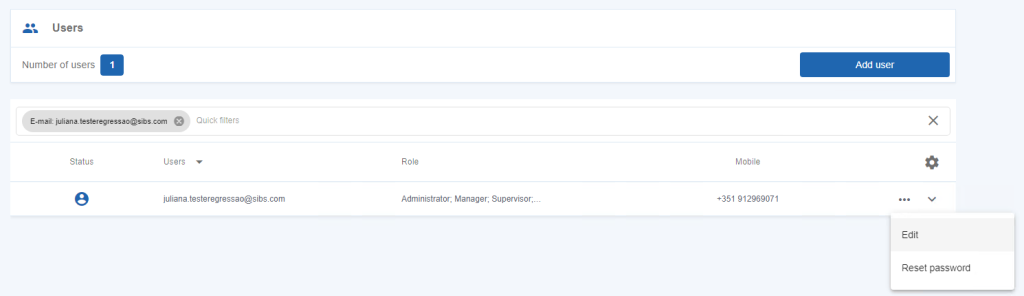
Figure 8 – Edit User Data
The Edit User page is displayed.
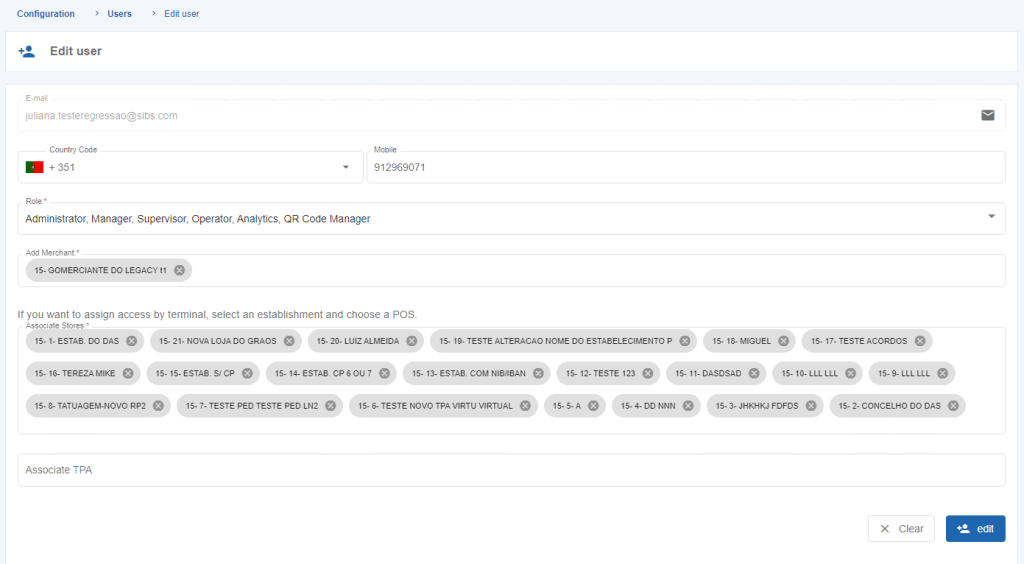
Figure 9 – Edit User Details
The following information can be updated:
- Mobile phone
- Assigned profile
- Associated merchants
- Assigned stores
- Associated POS terminals
The user’s registered e-mail address cannot be modified.
If the mobile phone number is changed, a validation code is sent to the new mobile number to complete the update.
Step 4. Save the changes.
User Profiles and Permissions
The permissions available to each Backoffice user are determined by the assigned user profile.
Profiles define the operational areas, configuration menus, reporting capabilities, and administrative functions available within the platform.
When creating or editing users, administrators should assign only the permissions required for the user’s operational responsibilities.
For a complete description of Backoffice profiles and permission scopes, refer to G.1.1 – Access and User Management.
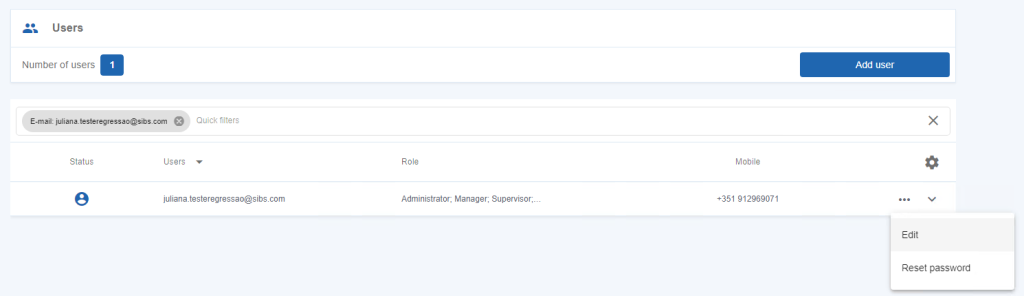
Figure 10 – User Profiles / Permissions
Resetting a User Password
If a user is unable to access the SIBS Backoffice because the password has been forgotten or needs to be reset, the password reset process can be initiated from the Backoffice login page.
Step 1. Open the SIBS Backoffice login page.
Step 2. Select Forgot your password?.
Step 3. Enter the e-mail address associated with the user account.
Step 4. Follow the instructions provided to reset the password.
After the password reset request is validated, the user can define a new password and regain access to the Backoffice.
For detailed information about the password recovery procedure, refer to G.1.1 – Access and User Management.
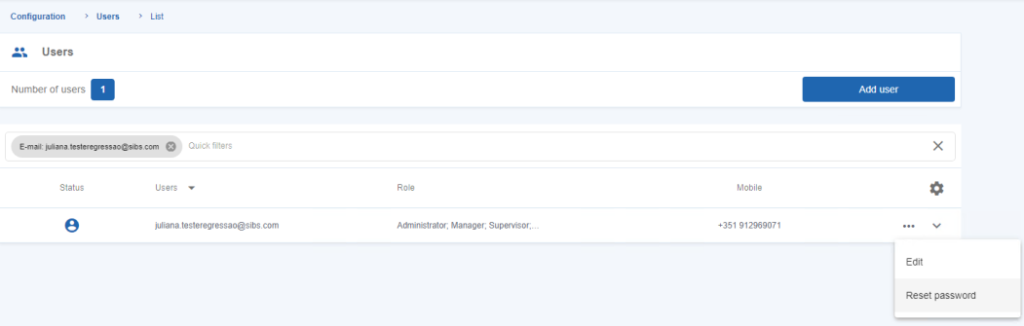
Figure 11 – Password Reset / Forgot Password
Permissions
User Administration is available only to users with administrative privileges.
The operations available within this section depend on:
- The authenticated user’s profile.
- The permissions assigned to that profile.
- The merchant context currently selected.
- The services enabled for the merchant.
As a result, different administrators may have access to different user administration capabilities.