

Overview
The Transaction Operations feature allows users to perform operational actions on transactions when those actions are supported by the transaction type, current transaction status, merchant configuration, and the authenticated user’s permissions.
Available operations include Collect Payment (Capture), Cancel an Authorisation, Refund a Transaction, Request Operation, Transaction Receipts, and Transaction Comments.
Before performing any transaction operation, users should review the Associated Transactions to verify the current state of the payment lifecycle and ensure that the requested operation is applicable.
Collect Payment (Capture)
The Collect Payment operation allows users to complete a previously authorised payment.
Only an authorisation that has not been cancelled can be collected. Before performing this operation, users should review the Associated Transactions to verify that the authorisation has not already been cancelled.
To collect a payment:
Step 1. Open the required transaction.
Step 2. Open the transaction operations menu.
Step 3. Select Collect Payment.

Figure 1 – “Collect Payment”
The payment may be collected for either:
- The full authorised amount.
- A partial amount.
Note: When a partial payment is collected, the remaining authorised amount is automatically cancelled.
To complete the operation:
Step 4. Enter the amount to be collected.
Step 5. Select “Perform authorization”.
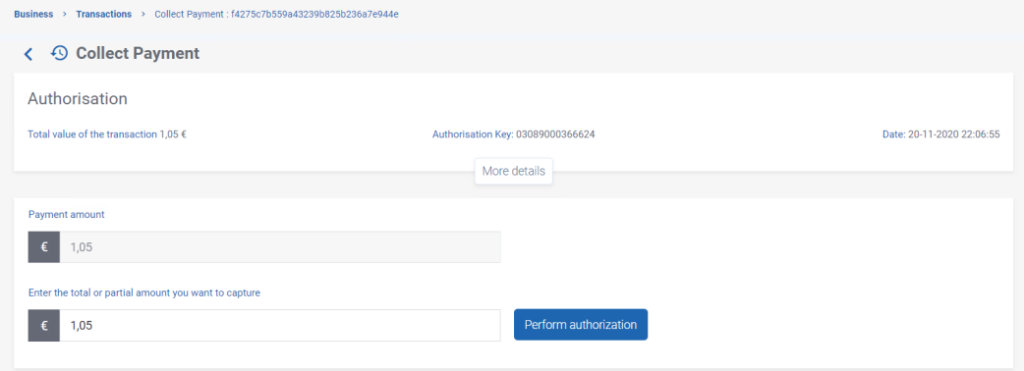
Figure 2 – Fill in the Payment amount
Step 6. Confirm the operation.
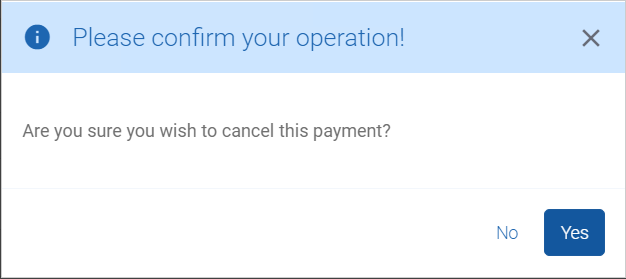
Figure 3 – Payment Operation Confirmation
If the operation is successful, a Payment transaction is generated.
Cancel an Authorisation
The Cancel operation allows users to cancel a purchase authorisation that has not yet been collected.
Only an authorisation that has not been collected or cancelled can be cancelled. Before performing this operation, users should review the Associated Transactions to verify that the authorisation has not already been collected.
To cancel an authorisation:
Step 1. Open the required transaction.
Step 2. Open the transaction operations menu.
Step 3. Select Cancellation.

Step 4. Fill the amount of the authorisation to cancel.
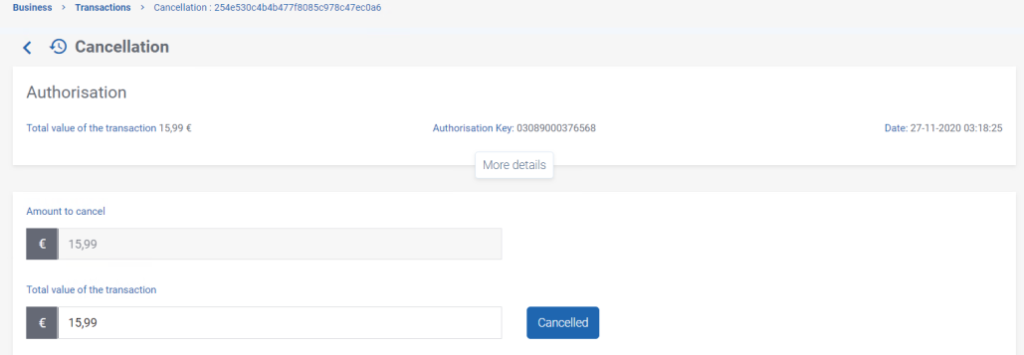
Figure 4 – Fill in the Cancellation amount
Step 5. Confirm the operation.
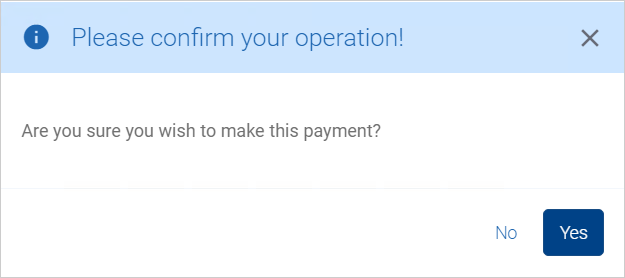
Figure 5 – Authorisation Cancellation Confirmation
Refund a Transaction
The Refund operation allows users to refund the amount of a completed purchase.
Before performing a refund, users should review the Associated Transactions to verify that the amount to be refunded has not already been refunded.
To refund a transaction:
Step 1. Open the required Purchase transaction.
Step 2. Open the transaction operations menu.
Step 3. Select Refund.

Figure 6 – Purchase “Refund”
The refund may be either:
- Full.
- Partial.
To complete the refund:
Step 4. Enter the amount to be refunded.
Step 5. Select Refund.
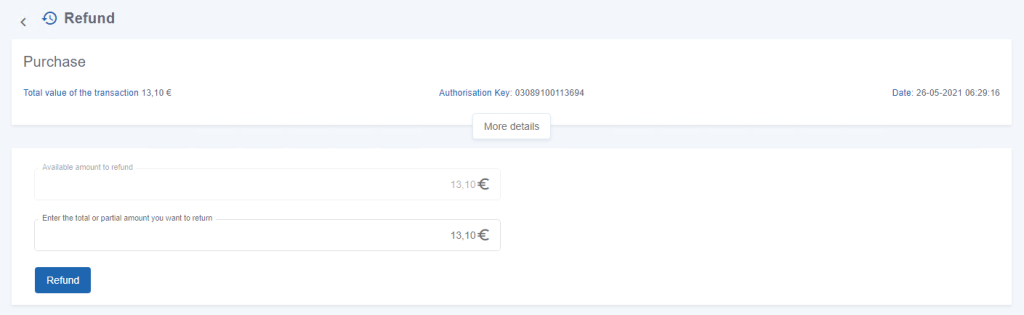
Figure 7 – Fill in the Refund amount
Step 6. Enter the password.
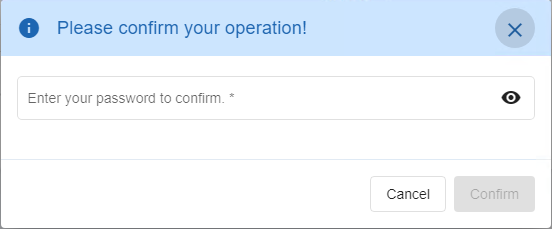
Figure 8 – Password entry to confirm a Purchase Refund
Step 7. Select Confirm.
If the operation is successful, a Refund transaction is generated.
Request an Operation
Merchants that do not have authorisation to use a Z8 terminal cannot directly perform Refund, Collect Payment, or Cancellation operations.
When these operations are unavailable, users can request the required operation.
To request an operation:
Step 1. Open the required transaction.
Step 2. Open the transaction operations menu.
Step 3. Select Request Operation.
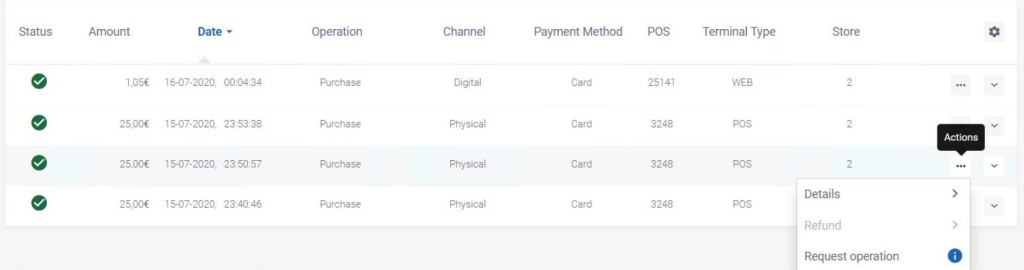
Figure 9 – “Request Operation”
A message is displayed informing the user that the requested operation requires a SIBS Backoffice virtual terminal and advising the user to contact their financial institution for information about terminal Z8.
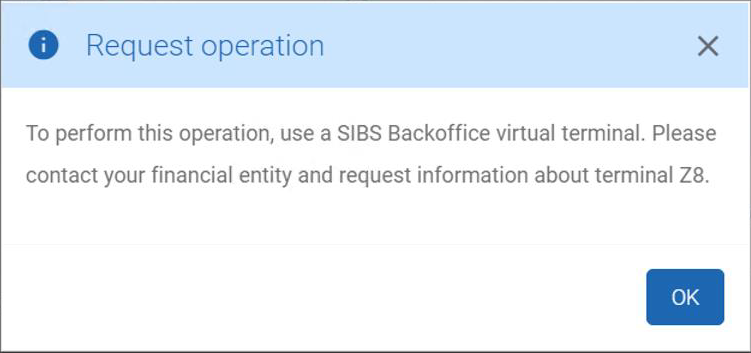
Figure 10 – “Request Operation” Pop-up
Transaction Receipts
SIBS Backoffice allows users to generate transaction receipts for Purchases and Refunds.
Receipts may be sent by e-mail or downloaded in PDF format.
To generate a receipt:
Step 1. Open the required transaction.
Step 2. Open the transaction operations menu.
Step 3. Select Receipt.
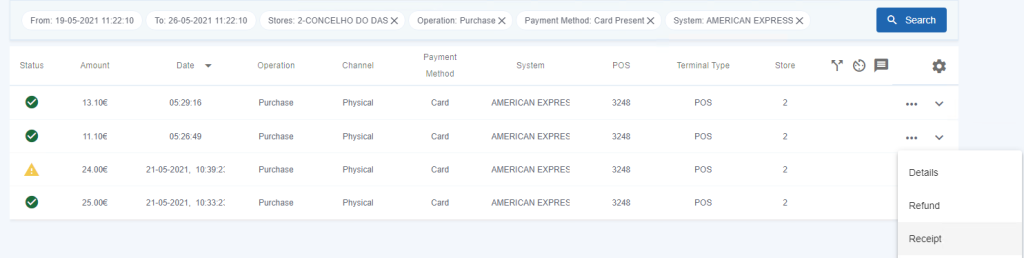
Figure 11 – Obtain a Transaction Receipt
Step 4. Enter the destination e-mail address.
Step 5. Submit the receipt.
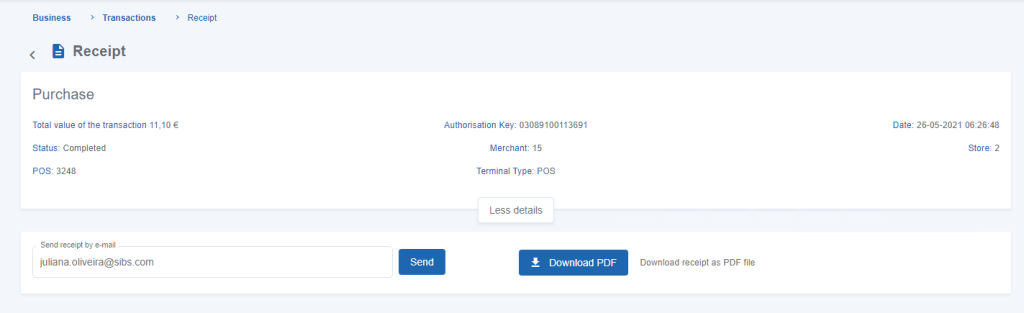
Figure 12 – Form for sending a Transaction Receipt
Note: For refund transactions, the generated receipt contains only the refunded amount.
Transaction Comments
Users can add comments to individual transactions.
Comments are visible to all users with access to the transaction and provide additional operational information.
Each transaction can contain a maximum of three comments.
To add a comment:
Step 1. Open the transaction operations menu for the required transaction.
Step 2. Select Add Comment.
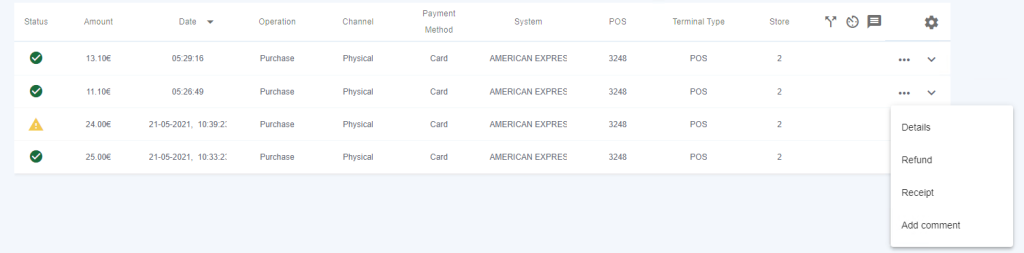
Figure 13 – “Add Comment”
Step 3. Enter the comment.

Figure 14 – Textbox to add comment to transaction
Step 4. Save the comment.
When a comment is successfully saved, a confirmation message is displayed.
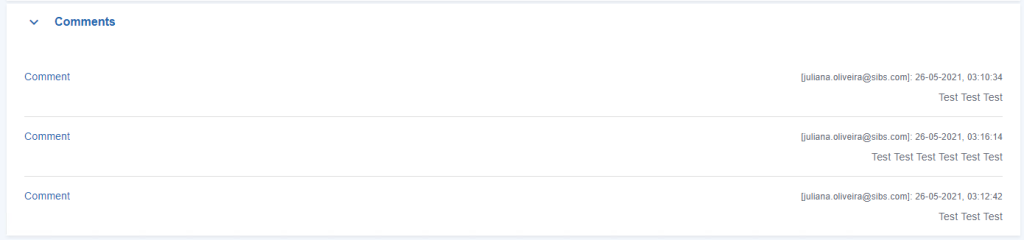
Figure 15 – “Comments” column associated to a transaction
Transactions containing comments are identified in the transaction list by the Comments column.